 I purchased the Made of Snow set and just fell in love with it.. As I was brainstorming I thought the accessories would probably go with other stamps from my PTI sets.. So, I started playing around and was excited to see that the accessories fit with many of the little animal stamps I have accumulated!! The little sheep is by far one of my favorite stamps from Nichole's sets.. I just love the simplicity of the image and the darling legs and face. It's such a cozy little design that I thought it would go perfect with the sentiment and the scarf and hat!! Thanks for looking!!
Friday, October 31, 2008
Honorable mention...PTI
 I purchased the Made of Snow set and just fell in love with it.. As I was brainstorming I thought the accessories would probably go with other stamps from my PTI sets.. So, I started playing around and was excited to see that the accessories fit with many of the little animal stamps I have accumulated!! The little sheep is by far one of my favorite stamps from Nichole's sets.. I just love the simplicity of the image and the darling legs and face. It's such a cozy little design that I thought it would go perfect with the sentiment and the scarf and hat!! Thanks for looking!!
Posted by
Bridget
at
1:45 PM
0
comments
![]()
![]()
Thursday, September 25, 2008
September PTI Blog Hop!!
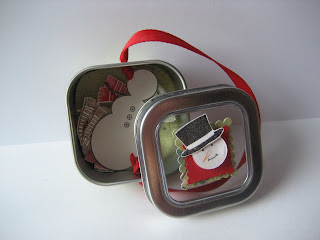
 Magnetic Snowman Kit!!

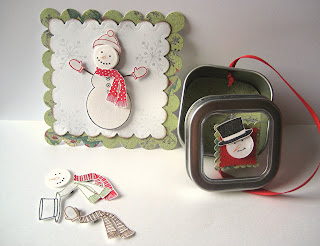
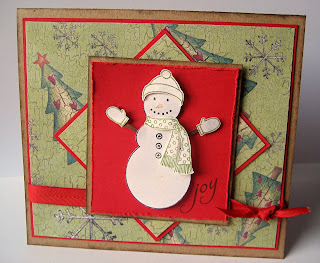 I started this project off by creating the card first. The important thing about my card was that it would have
  an inside pocket to hold my "magnet board". So, when I scored my card I made sure to leave an inch at the bottom when I folded it over. I then just folded the remaining inch up and inward to form the pocket. I used two small glue dots on both sides to keep it closed. For the outside of the card I used my new set from PTI Made of Snow. What a versatile set that can be used all winter long! I just love it. I stamped each part of the snowman along with his accessories and cut each individual piece out. I then just "built" my snowman using glue dots and dimensionals to add some depth. I used a small piece of tape to cover his nose when I stamped the eyes and mouth. I then just colored the nose with a orange marker and re-stamped the face. As for the inside of my card, I stamped the middle sized snowflake from last years set, Snowflake Serenade in red and green ink. I then stamped the sentiment, "Snowmen fall from heaven unassembled". I thought this fit perfect with the theme of my project. Next, I had to create my "magnet
  board". This is for when the recipient does not have a magnetic surface in front of them..(if they were at a restaurant or church). I bought some magnetic paper from Hobby Lobby. It has paper on one side and the magnetic surface on the other. The paper side acts as a magnet and it is so nice because you can run it through your printer for other projects. It also runs through my
  Cuttlebug perfectly(love that little green machine) with the nestabilities die-cuts. So, I chose the size I wanted, cut it out and decorated it. It slid perfectly in the inside pocket of my card.
 stamped the snowman body and cut it out. I then cut out small arms from brown card stock and placed onto the snowman. I then ran the smallest circle nestie I own through my Cuttlebug to create the faces of my snowman. It was a perfect fit. It was then time to cut out the individual pieces so I first stamped each scarf image with different colored inks and cut those out. I cut between the inside of the scarf to add more movement to them. I then stamped the hat images along with the mitten images and cut those out as well. Once I had all my snowman pieces I took my Crop-a-dile and used the smallest punch to punch out tiny magnetic circles from my magnetic paper. I then just placed those onto the backs of my snowman and accessories with glue dots.
Posted by
Bridget
at
2:08 PM
28
comments
![]()
![]()
Monday, September 15, 2008
September PTI release party
 I used my square nesties to cut out a large square from my card base. I then just went down in size and layered two more nestie squares that would fit inside the first square I cute. I then stamped and cut out my spiders and threaded some sewing thread for the web. I then took a small glue dot and placed it on the inside, front upper flap and placed my spiders on there. Because the thread is so fine, I just took my crop-a-dile and punched out 3 tiny dots that I used to place over the thread and glue dot. This worked perfectly and blended in nicely with the card. I had the largest spider hold onto the sentiment and I like how his little legs overlap the paper. I then just finished the card off with the sentiment in the lower right corner. Very easy and fun card to create.
  I love giving my kids little gifts to open up now and then, especially around holidays. Well, I decided to create this small coffin to hang on their doors for Halloween. It is a template that I created and would be happy to share with anyone who is interested! I first stamped my images onto the black CS and then cut out my template. I punched 2 small holes on the side of the coffin and threaded my ribbon in to form my loop. I used the sentiment "Open if you dare" and placed that on top of the coffin with a small brad. I used a photo frame hinge to keep the lid closed. It works perfectly for this project. I then just filled my coffin up with Halloween candy and trinkets and its ready to be hung!! I can't wait to surprise my kids with these Halloween morning! I've made these in the past as party favors for a Halloween party. You can add the child's name onto them with a clear label.
 My third entry was my creepy kitchen recipes box. 
 This was really fun to create and I think would make a great gift for a teacher, mom or anyone who enjoys making and baking food!! I first surfed the net and found fun, unique, different and healthy Halloween recipes. I printed them off from my computer and made little recipes cards that would fit inside a small gable box. I then decorated the outside of the gable box in Halloween fashion. I then took the sentiment "Creepy Kitchen Collection" and masked off the word "Collection" I then printed off the word Recipes from my computer and stamped "Creepy Kitchen" above it. I am planning on giving this to my sister-in-law who is a teacher/mom a few weeks before Halloween..that way she can start testing out the different recipes!!
My fourth entry was my candy corn card.  I had this delicious candy corn paper that I was drawn to but no candy corn card. So, I looked through my stamp sets and saw one of the party hats from the It's a Celebration set. I just masked off the different sections and stamped them onto white paper. I cut them out and used dimensionals when I placed them onto my card. I like how they look like you can just reach out and eat one. I stamped the sentiment directly onto the card itself and framed it with two brads.
Thanks so much for taking the time to look!! Can't wait to see all the entries for this month..so much inspiration just waiting to be tried!!
Bridget
Posted by
Bridget
at
7:59 AM
1 comments
![]()
![]()
Monday, August 25, 2008
Blog Hop
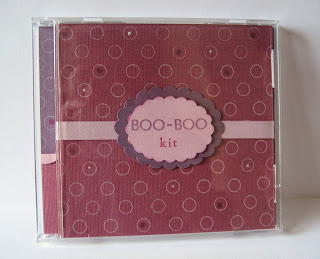 altering them into fun things!! I have to admit I struggled a bit with this one because I kept picturing Nichole's adorable licorice case..so my mind kept wanting to wander to Halloween and candy..However, once I looked through all my stamp sets the label stamps kept popping out to me for some reason..I then looked at my Halloween sets that just arrived today..(YIPPEE) and saw the word
  Boo..Right then..a BOO-BOO kit came to mind..Pretty simple but a fun little gift to give to young children or to even have around your home..
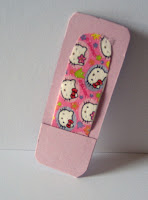
 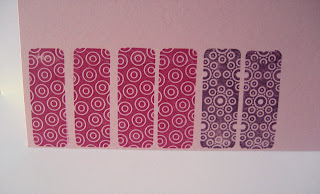 my band-aid holders. I took a piece of card stock, scored it at 1 inch lengthwise and then stamped the labels along the bottom of the fold. I then cut out each label making sure
  to not cut the bottom by the fold. Once you turn it over you will see the small
  pocket formed. Place a small dot of glue on each side to hold in place and slide band-aid in.
Posted by
Bridget
at
5:21 PM
23
comments
![]()
![]()
Saturday, August 16, 2008
Bitty Baby Blessings..
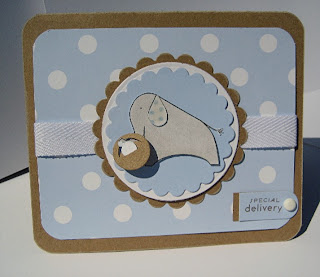 I was in the baby mood so made a few cards using the Bitty Baby Blessings set from PTI. I have made this card once before but with different colors so thought I would change it up a bit.. I just love the little elephant in this set, along with the tiny baby face..I created the basket by punching out a small circle and then just cutting the top center half out for the baby to fit in to. I love the colors of this card and the simplicity of the design..It would make a great baby boy shower card..
 little duck in this set works great with this theme. I took a small gable box and filled it with washcloths, little baby soap and shampoo and a tiny toy duck. I created the card using the the Bitty Baby Blessings patterned paper to coordinate with the box. The colors are a bit different for a baby but I thought it would be a nice change from the typical blue or pink or even green...I just love the small gable boxes too..they are the perfect size for all types of small gifts...so cute!!Thanks for looking..
Posted by
Bridget
at
10:20 AM
1 comments
![]()
![]()
Sunday, July 13, 2008
Happy Birthday Sammy!!
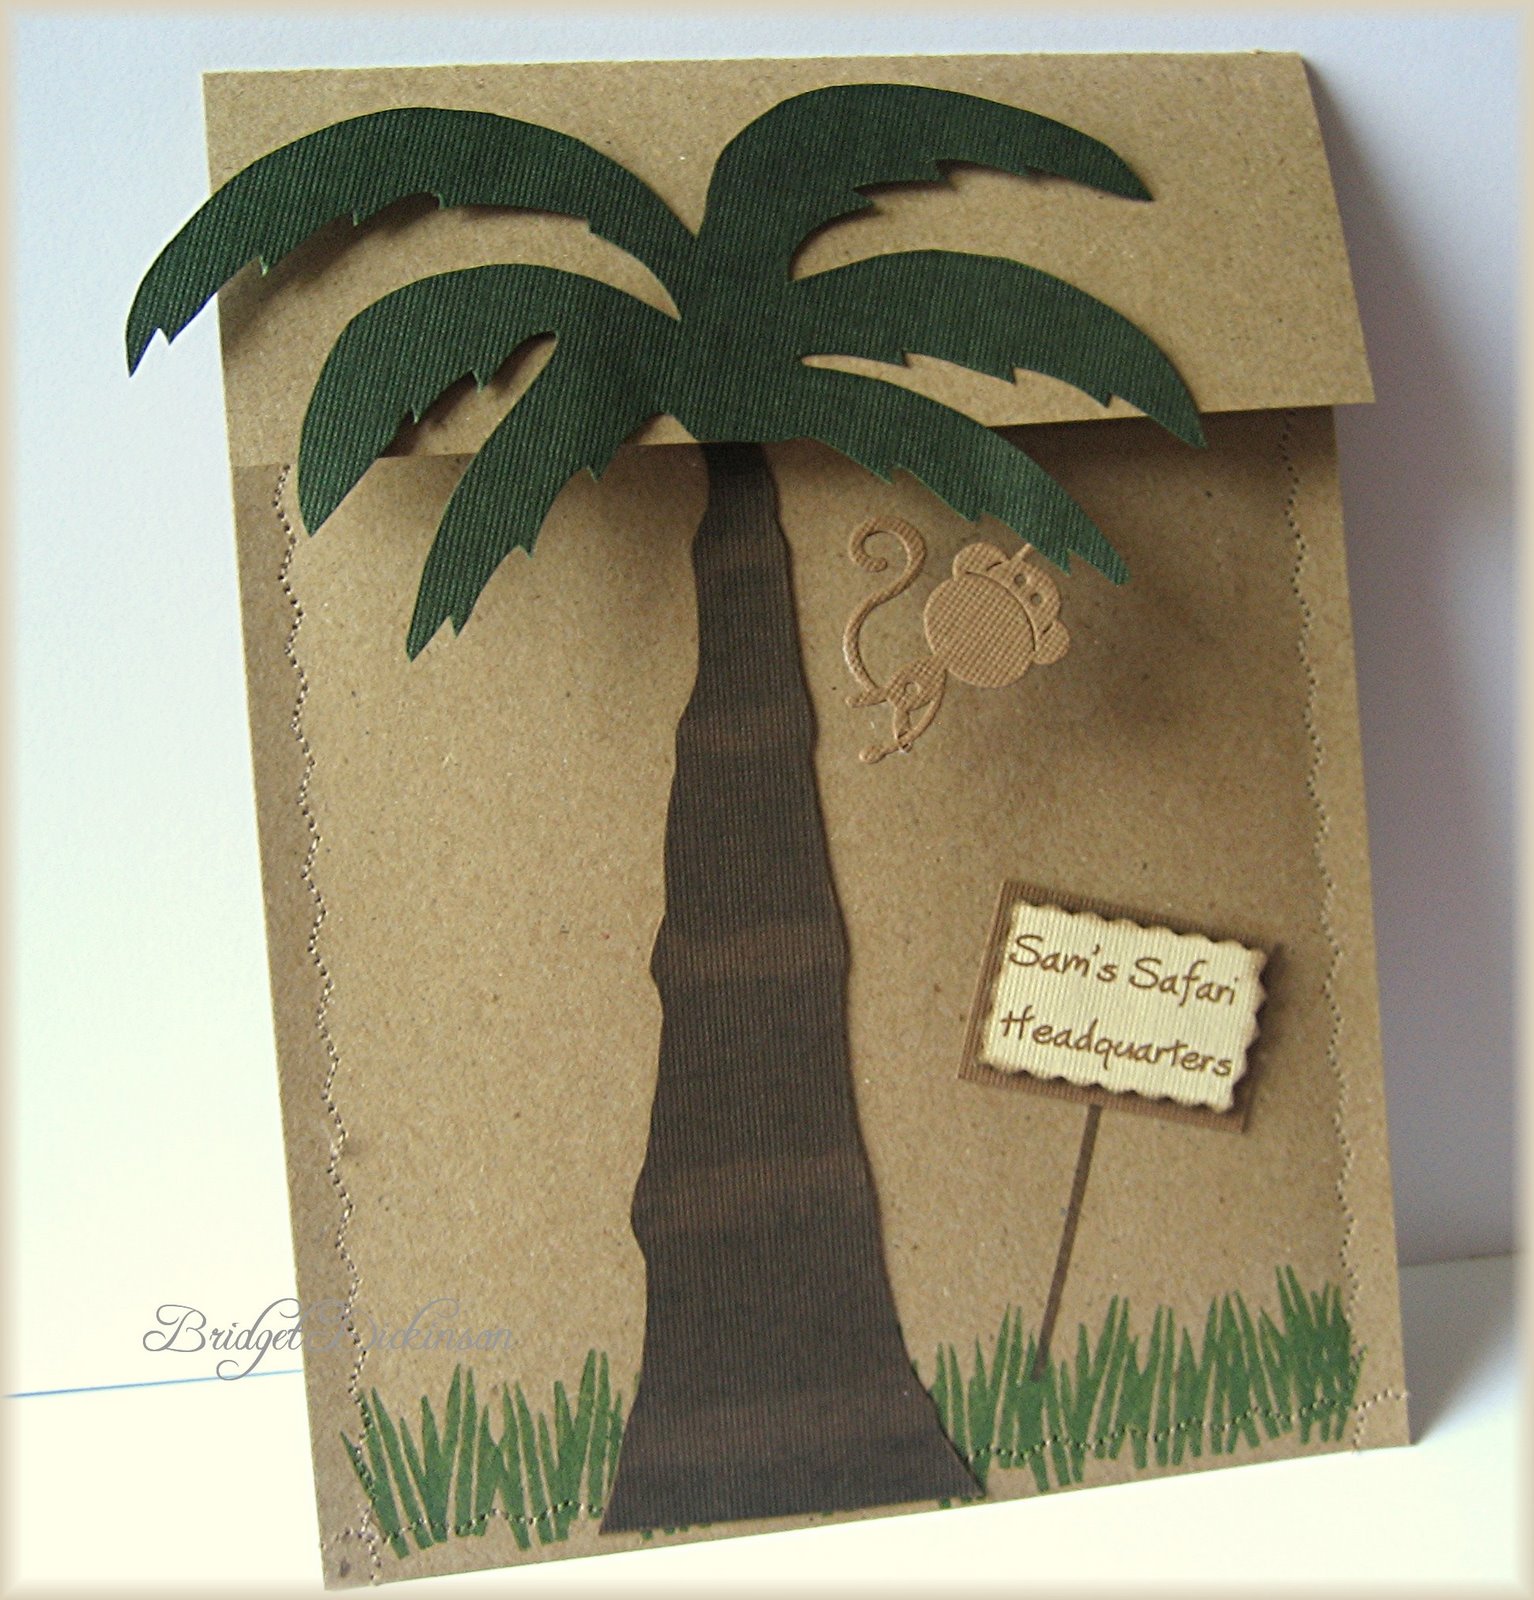 I decided on creating a pocket card similar to the baby shower invitation I had created awhile back. I love, love kraft paper so started with that as my pocket base. I cut two pieces, the back piece being about an inch and half longer than the front piece. I placed a piece of patterned paper with palm trees on the inside of the lid and on the longer piece. I then sewed along the
 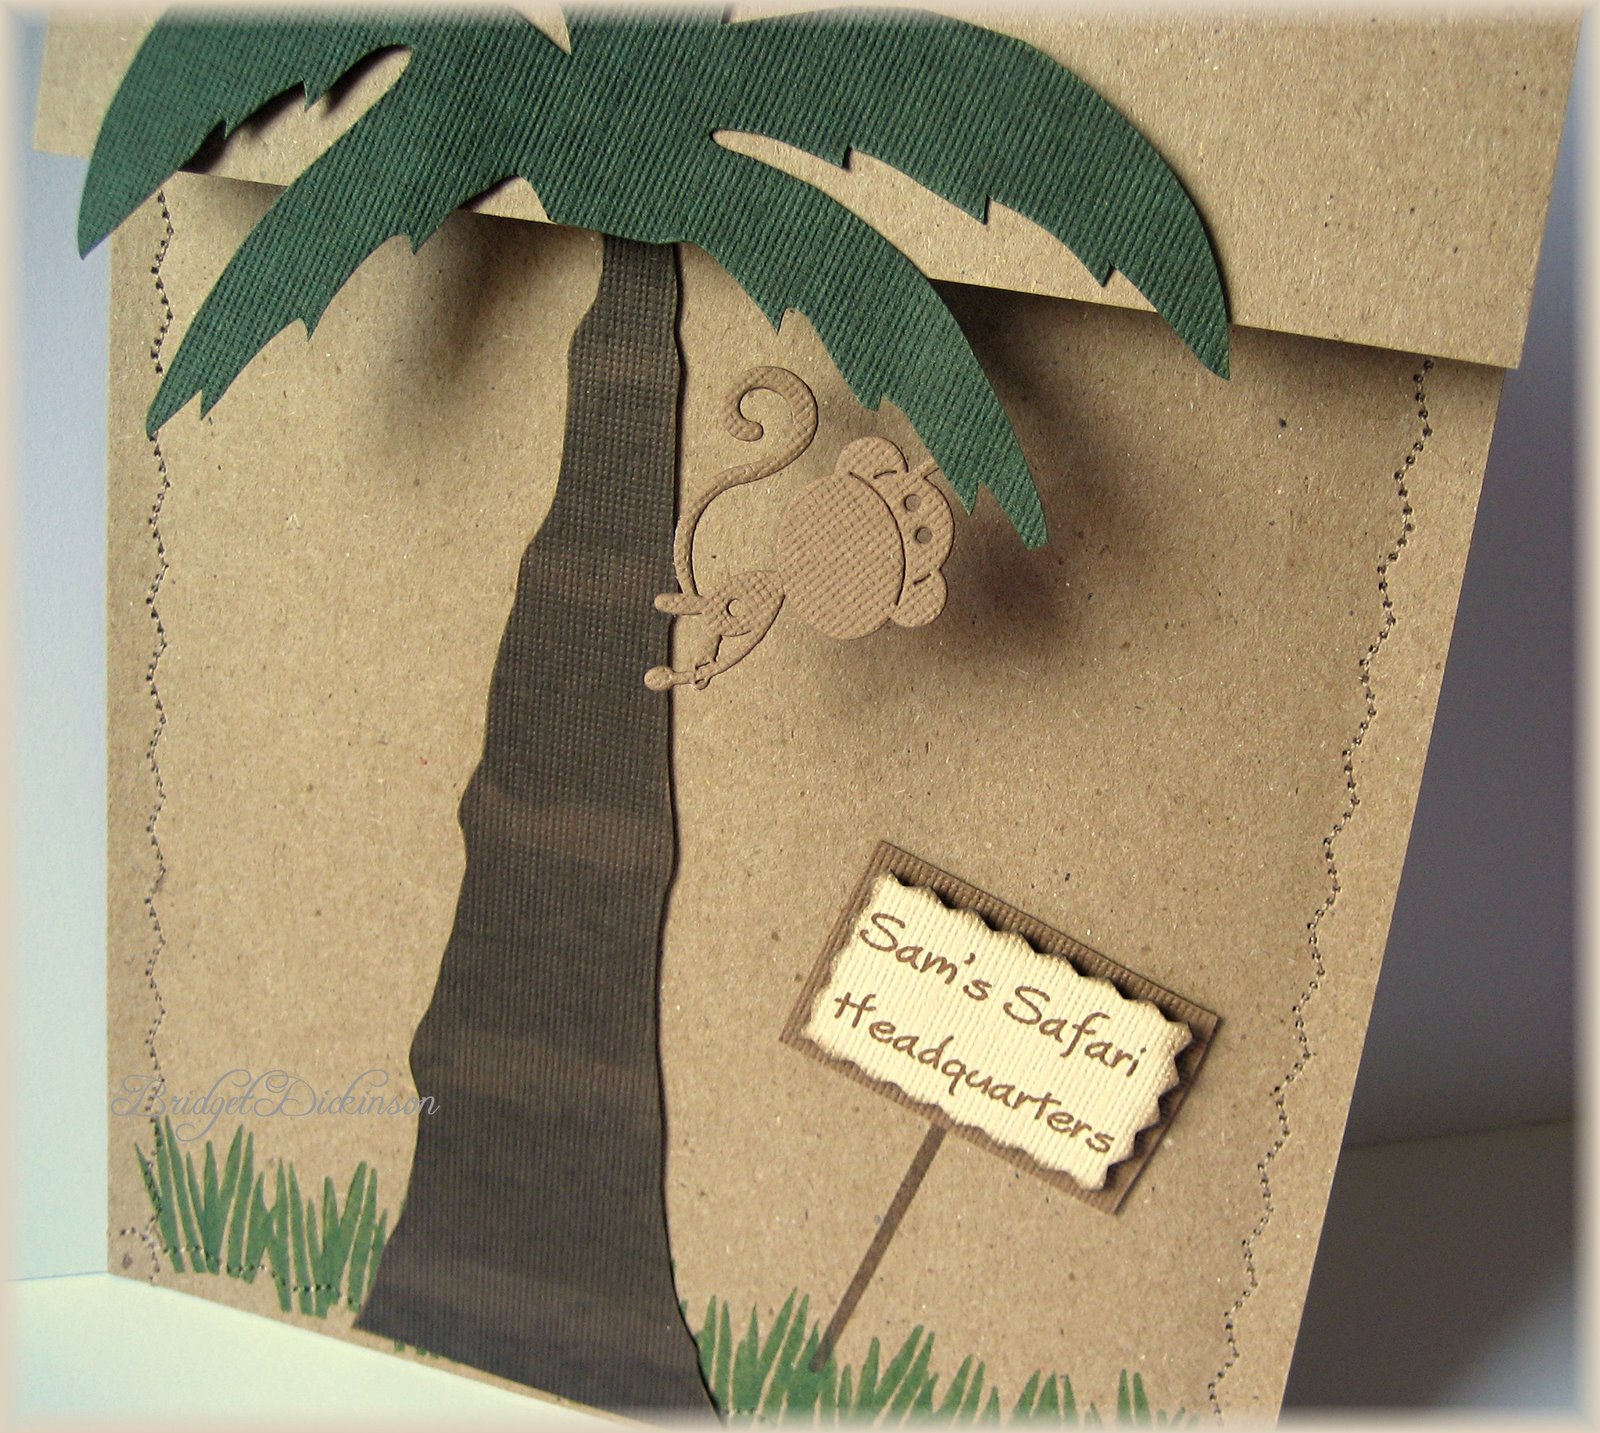 sides and the bottom, leaving the top portion open so my invitation could slide in and out of it. I then cut out a palm tree from card stock and distressed it a bit to give it a jungle feel. I placed the trunk of the palm tree onto the bottom portion of the card and the palms onto the top portion of the card..that way the card would still open up. I then stamped grass along the bottom and placed the palm tree onto the kraft card stock. I then used my jungle theme cuttlebug
 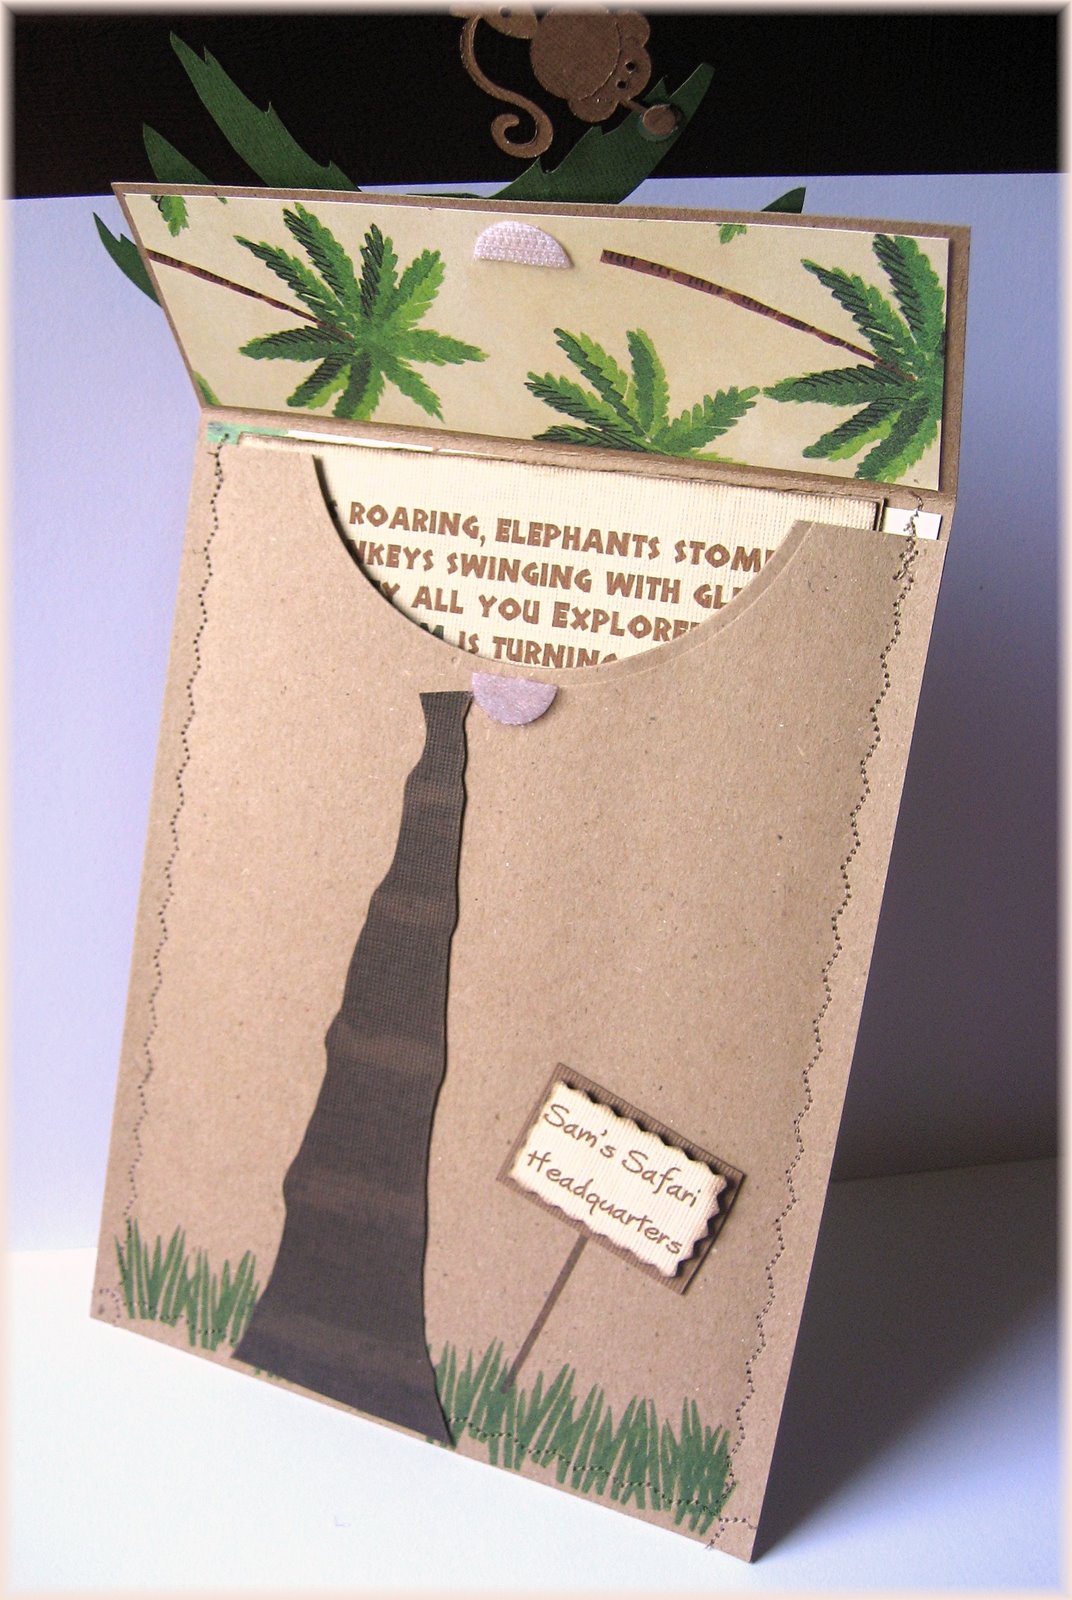 die cuts and cut out the little monkey..isn't he adorable?? I used a glue dot to adhere him to the back of one of the palms.. I then just printed "Sam's Safari Headquarters" onto paper and cut it out with scalloped scissors..I layered with a darker piece of card stock and placed created a sign.
  the information onto cream card stock. I placed this over a piece of brown card stock and distressed the edges of the brown by using my scissors to the edge..I don't have a "special" tool for this but have found that running one blade from my scissors along the edges works just as well. I then die cut a lion, elephant and monkey and placed them onto the invitation. I used my It's a Celebration set from PTI and stamped and cut out small party hats by using the little flags that go with the birthday banner..I just love those little hats.. and there you have it!! Happy Birthday Sammer Jammer!!!
Posted by
Bridget
at
8:59 PM
1 comments
![]()
![]()
Wednesday, July 9, 2008
I've been tagged!!
Posted by
Bridget
at
9:27 PM
0
comments
![]()
![]()
Birthday gift bags
I recently created some birthday favor bags for my niece's 4th birthday  party. I had so much fun creating these and they were so simple to do. I went to Hobby Lobby and bought the small canvas tote bags which are very reasonably priced.. I think you really get your money's worth by buying these totes compared to using the typical plastic favor bags that end up getting thrown away. I wanted each child to have a different bag and so I just went through all my stamp sets
 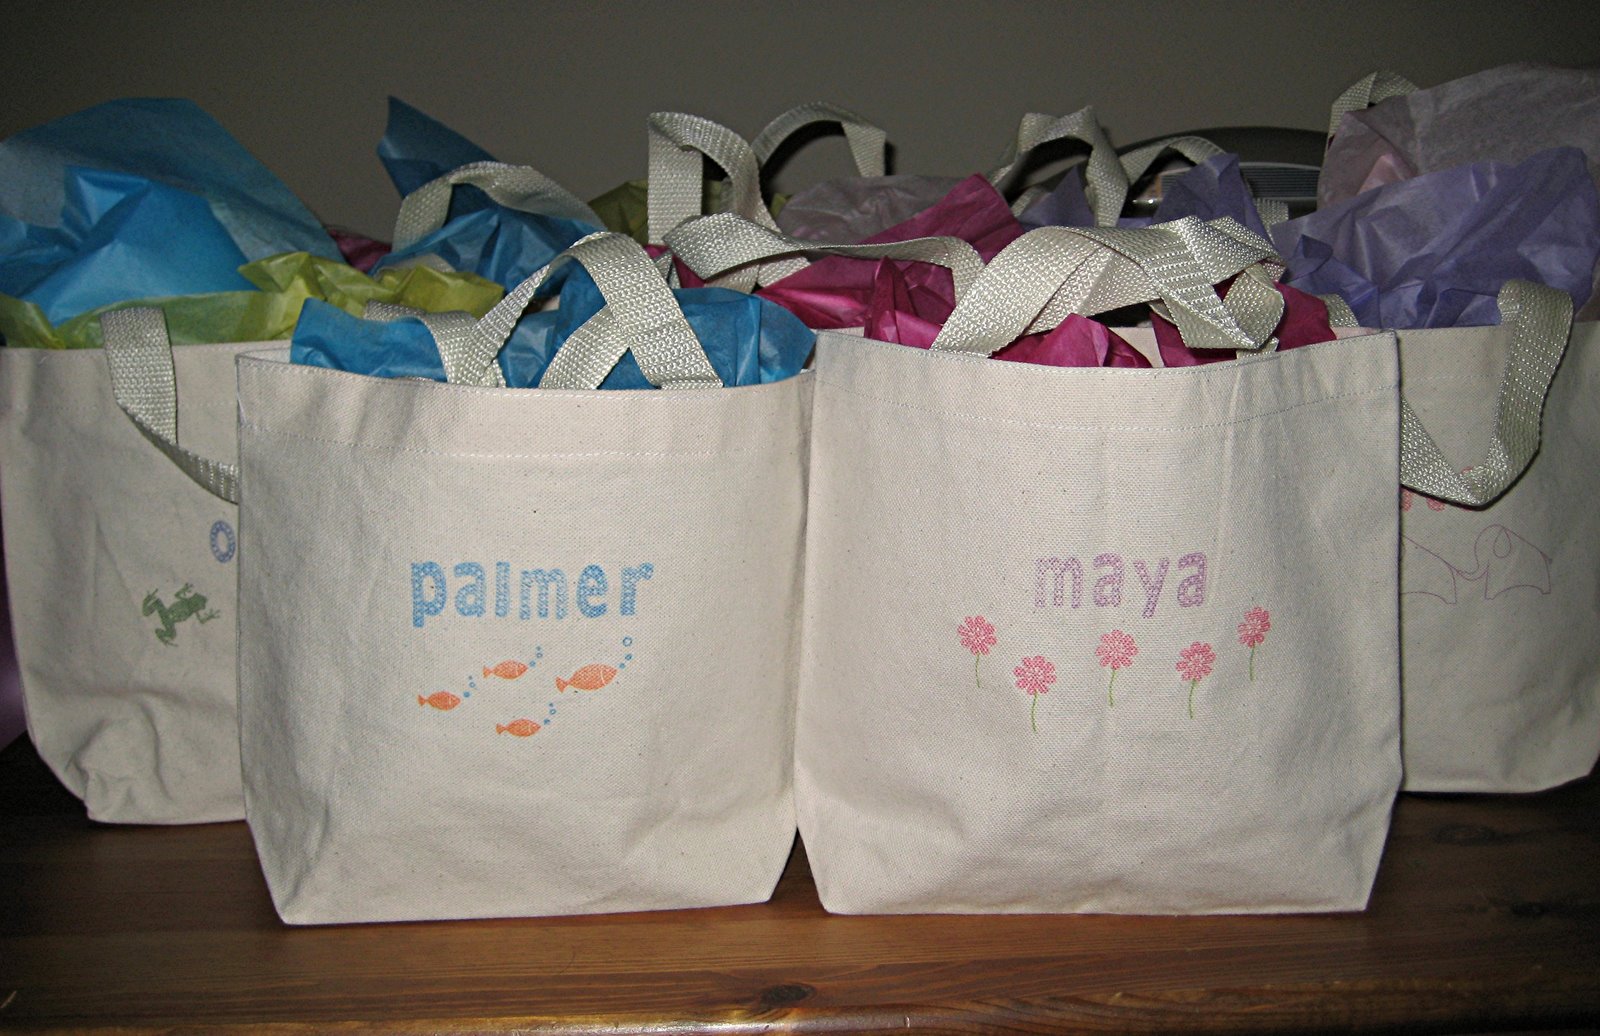 to find different images. I started by stamping each child's name onto a bag and then stamped the image I chose. I then made sure to use my heat gun to set the ink..you really have to be careful not to overdo the heating process or your bag can turn brown. Another tip I have found useful is to have your stain remover spray for your laundry close by..if for some reason you get some ink onto the cloth that you do not want I immediately spray a q-tip with the remover along with some water and quickly wipe over the area you do not want..it should remove the ink right away...it really does work!! These bags were so simple and inexpensive and a fun party favor that hopefully the guests will use over and over again!! Thanks for looking!
Bridget
***Side note..Hi Melissa..I used Palette Hybrid Ink..it works great for projects like these..just make sure to heat set it for a few seconds to really set the ink into the cloth..they can then be washed and will not fade!! Super simple and easy!!
Posted by
Bridget
at
9:08 PM
1 comments
![]()
![]()
Saturday, June 14, 2008
Another PTI Release has come and gone...
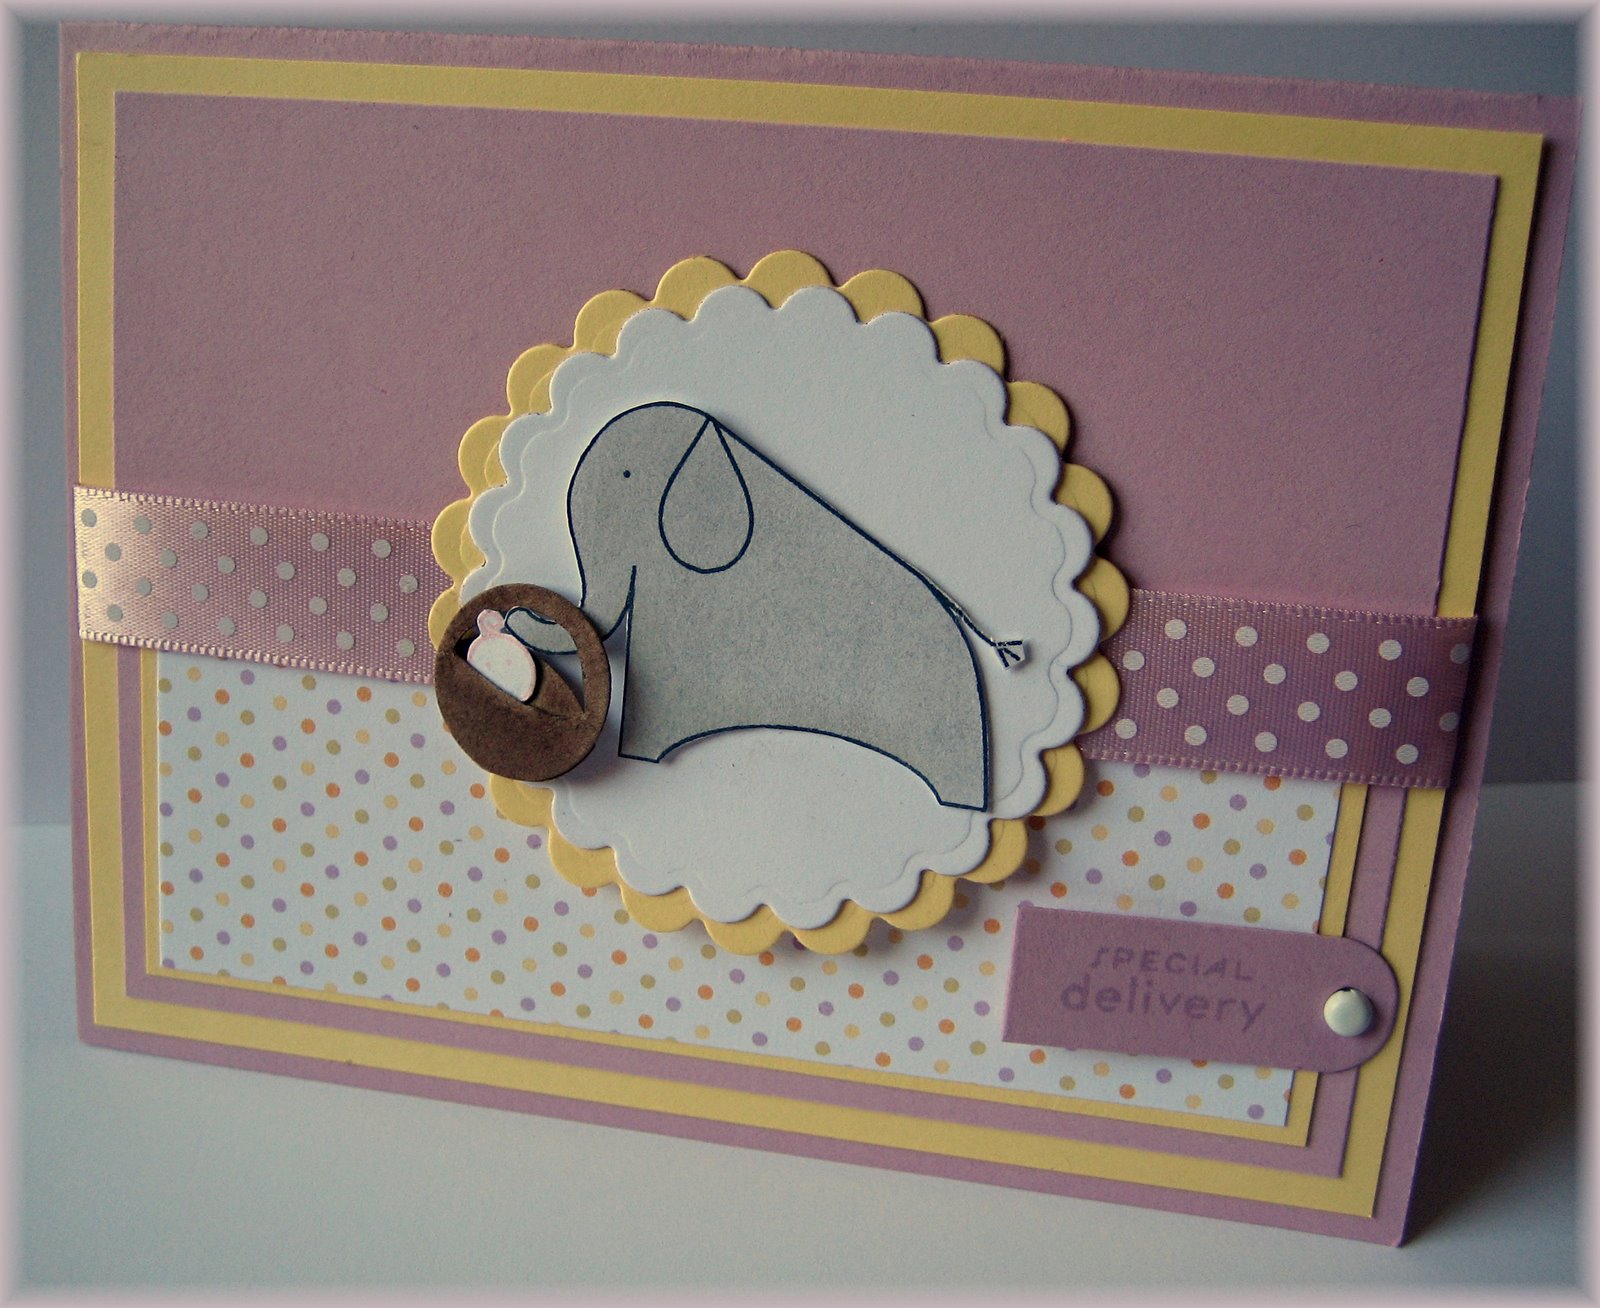 This first card was created using the new Bitty Baby Blessings set..what an adorable little set Nichole created. I used the new Lavender Moon cardstock along with the Bitty Baby Blessings Patterned paper and Lemon Tart cardstock.(all from Papertrey) I stamped the little elephant with my Noir Black Palette Ink and then colored him in with my pastels. I then used the smallest circle nestie and cut out the top center to create a basket.. I then just placed another circle behind it to create a 3d look to the basket. I stamped the little baby face and cut that out and put inside the basket. She fit perfectly inside.. I then just placed my basket handle on to the elephant trunk and used the sentiment "Special Delivery"...
 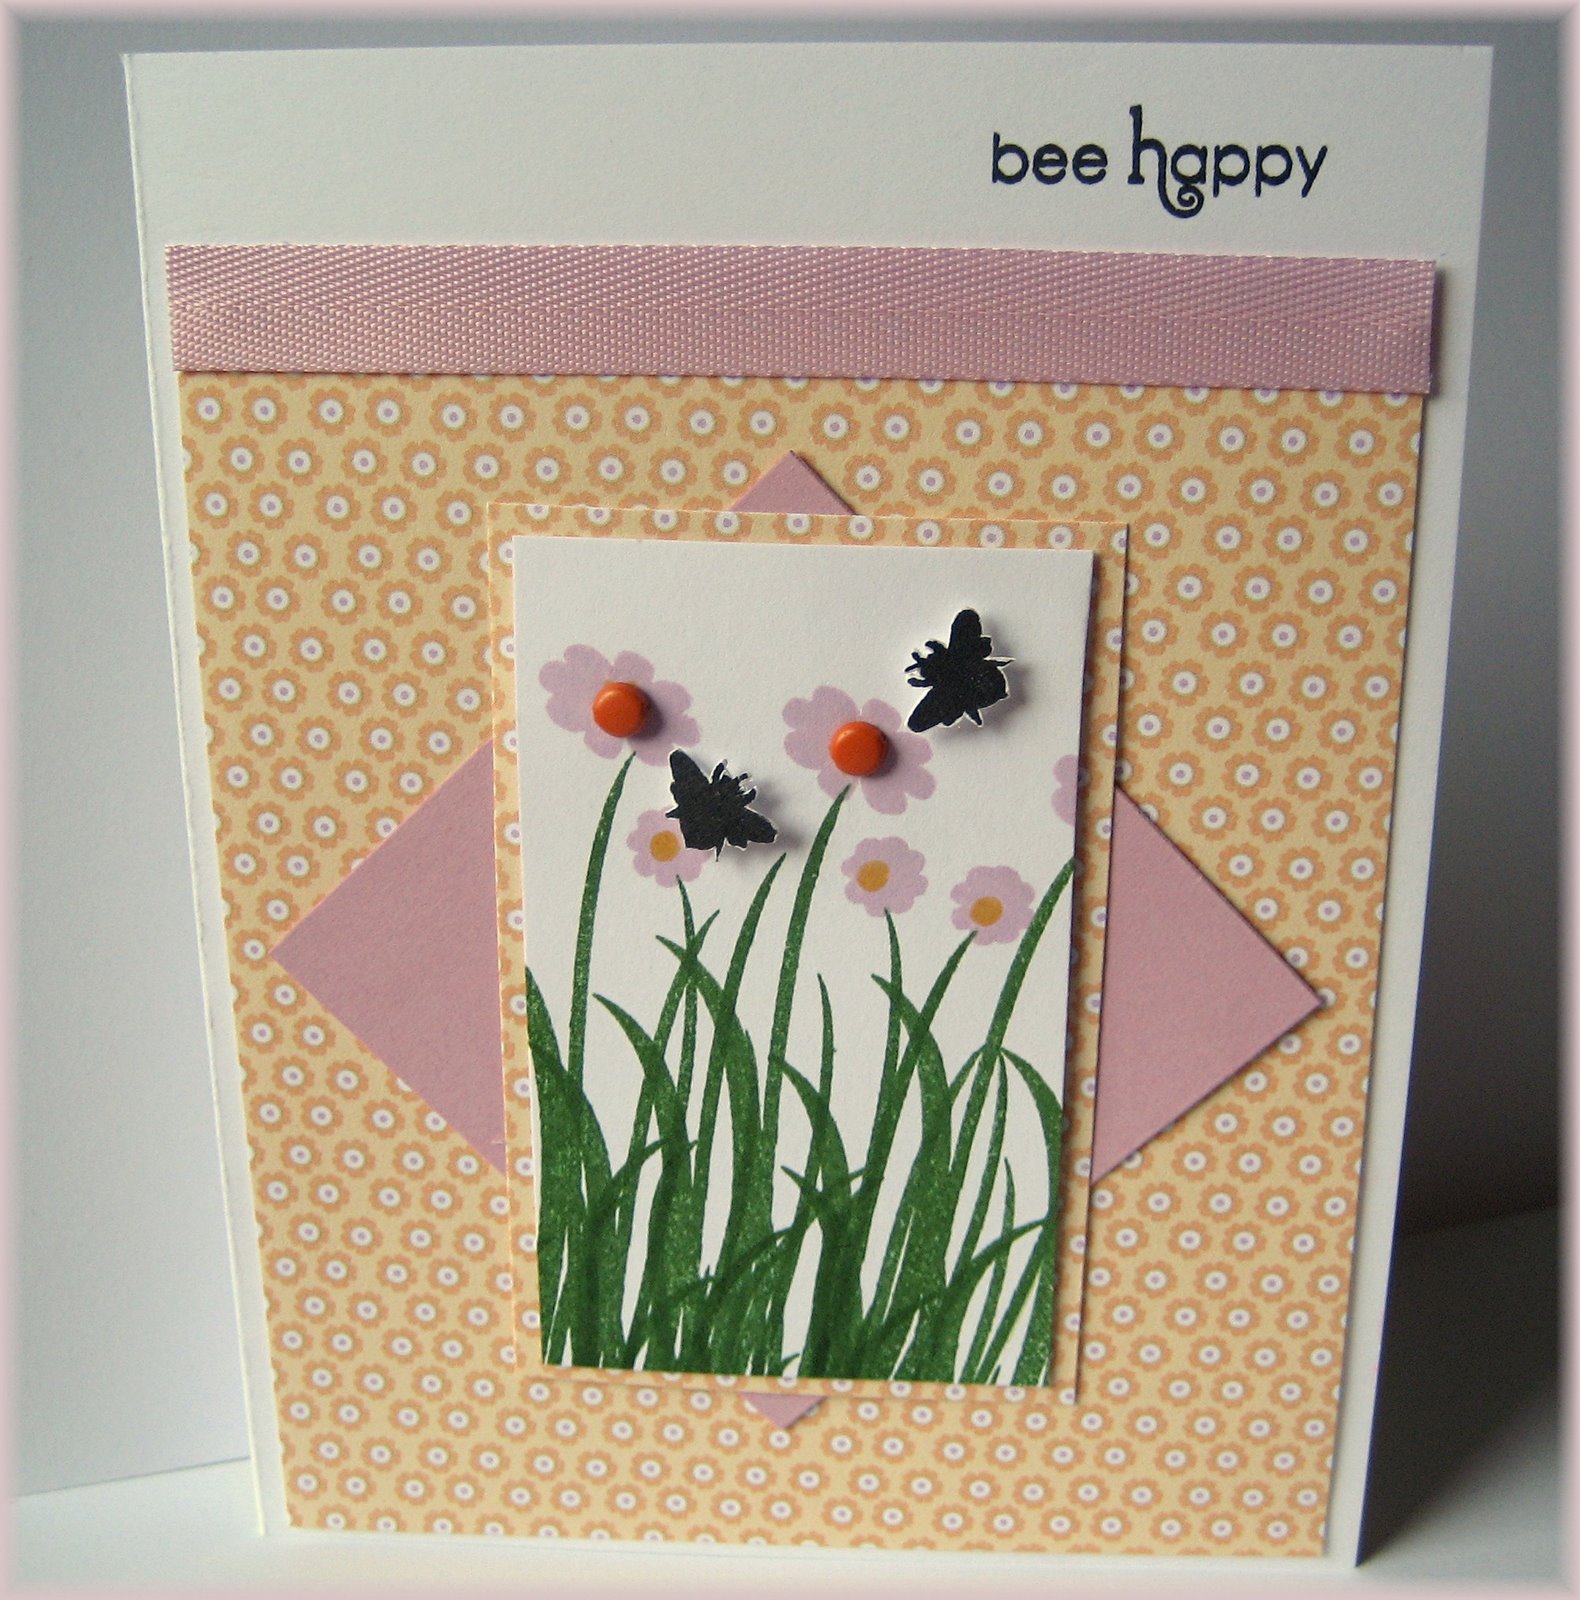 the Honey Bee set. What a fun little set to use. I just love the sentiments that go along with this set. I created the base of my card by using white PTI cardstock, the smaller flower patterned paper from Bitty Baby Blessings, along with Lavender Moon cardstock. I stamped the grass design onto a strip of white cardstock and placed a few of the flower designs onto the grass. I then placed a few orange brads inside the flowers for the centers and cut out two small bees.. I placed those onto the paper with dimensionals. I used the sentiment "bee happy". This is a very simple card but I think it would make some one's day if they received it in the mail...
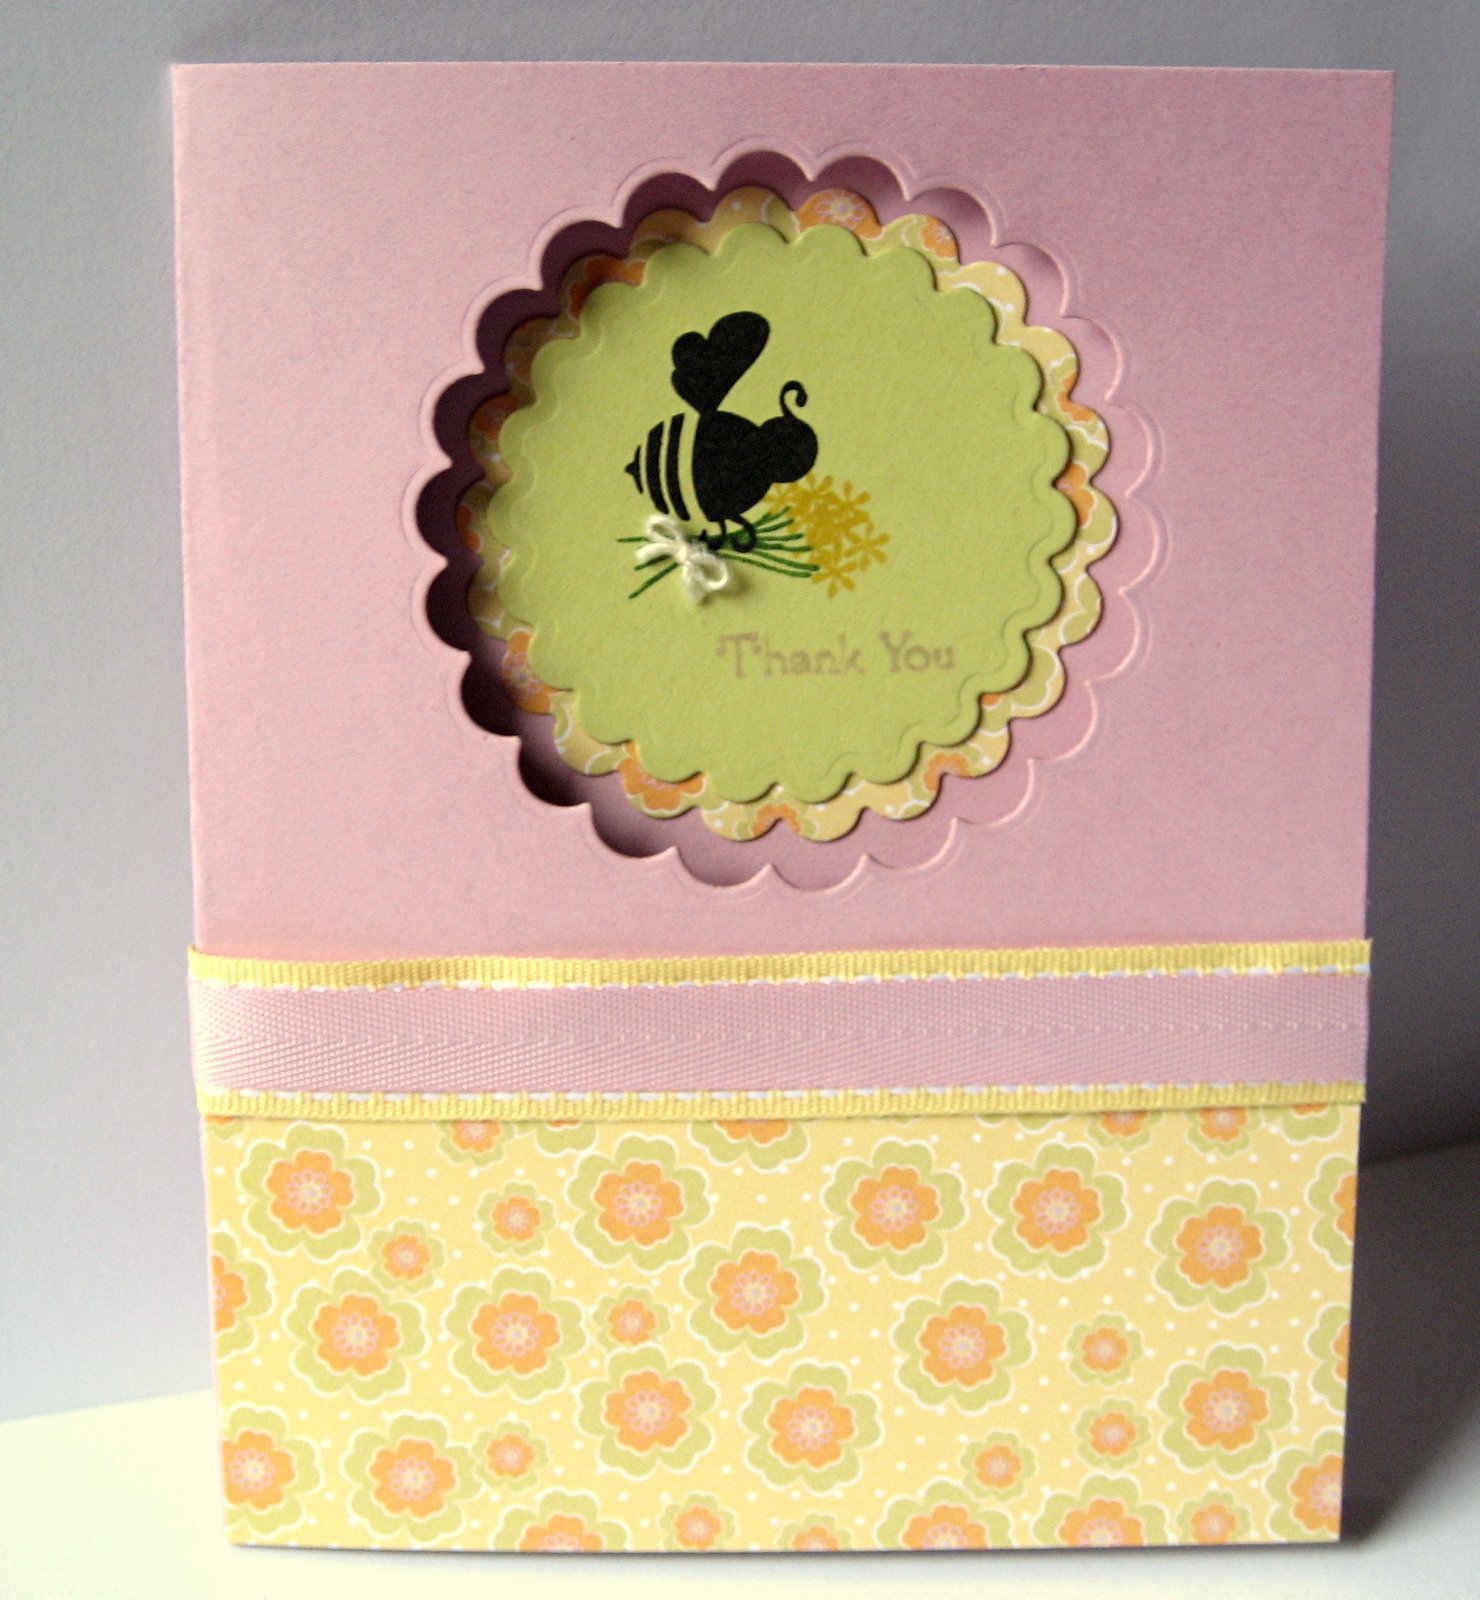 Lavender Moon cardstock as my base and used a scalloped circle nestie to cut out a circle onto the paper. I then cut out two smaller scalloped circles to fit "inside" the larger circle. I stamped the flying bee onto Spring Moss cardstock and he just looked like he should be carrying something so I stamped a bouquet of flowers for him to hold. I tied the bouquet with a small ribbon and used the sentiment "thank you". Looking back at the card now I wish I would have added a small eye onto his face to give him more of a personality..I think it would have added to the image. That is one thing that I have noticed when posting my cards.. I'm able to step back and really look at the card and see how I can improve it or change it.. I have been amazed how you miss little details when working on projects but once finished and you really take a look at your work you find things to improve on. I try not to over analyze though because I tend to be a bit picky and end up ruining the card!!
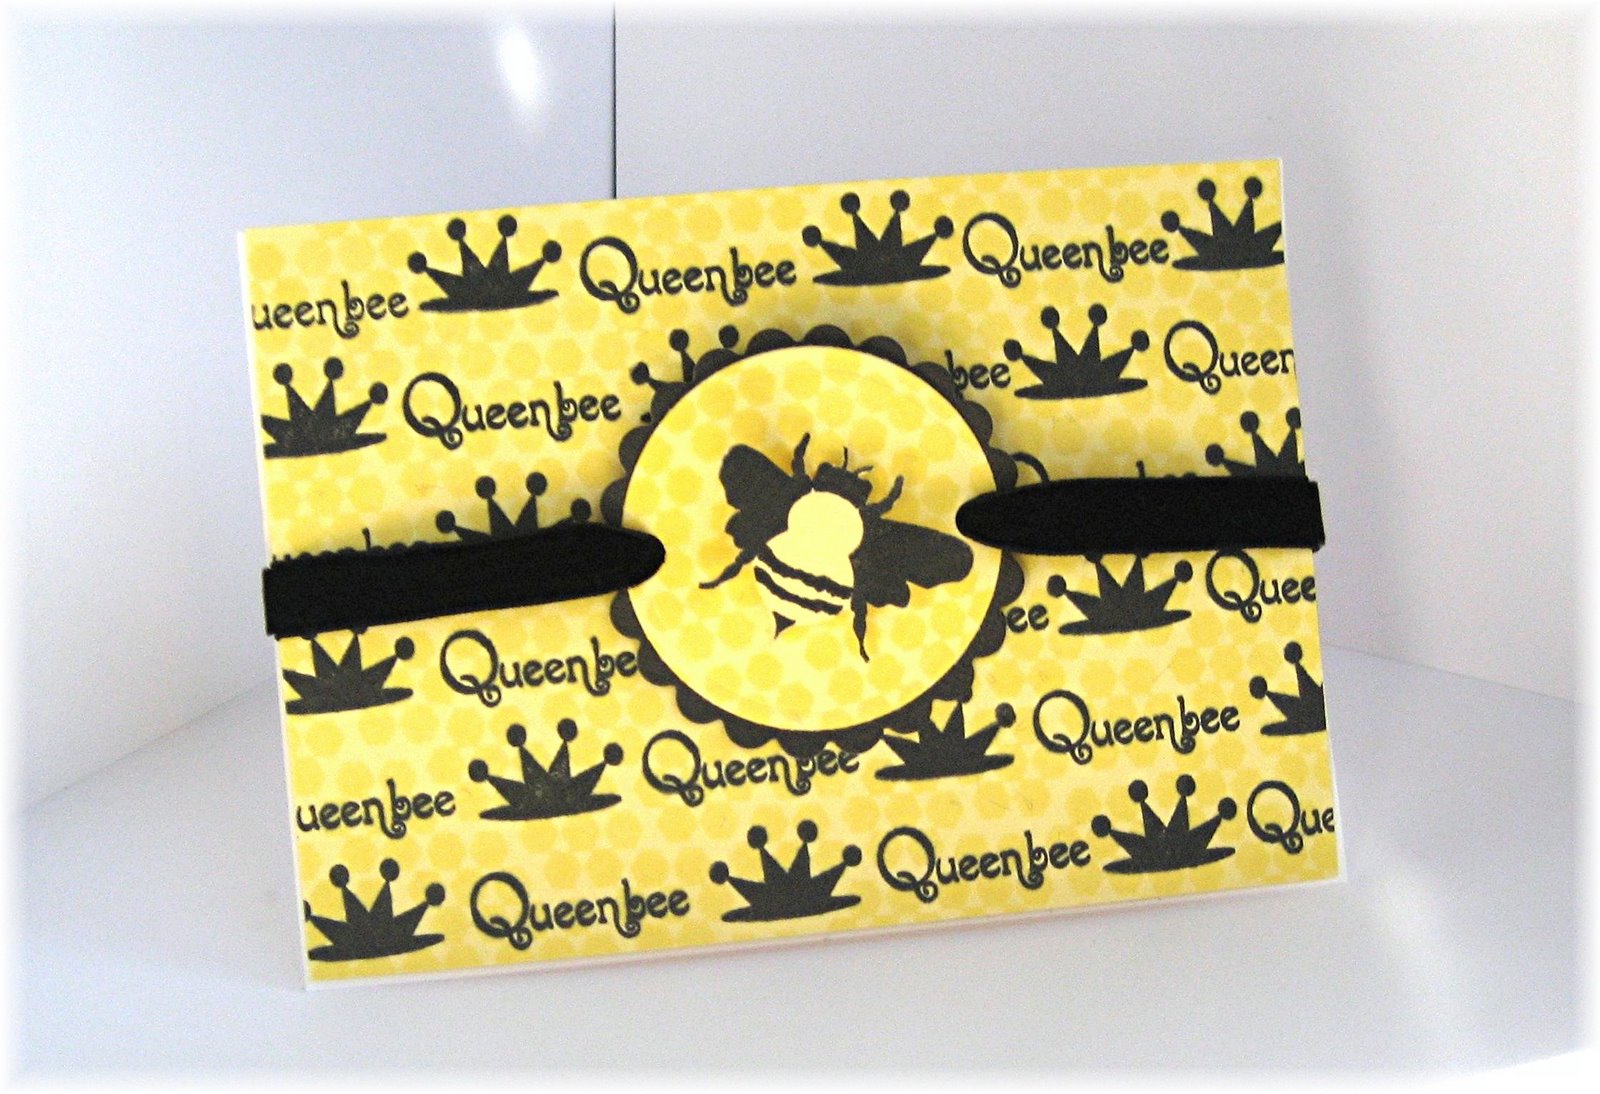 much thought. I love creating background paper for my cards and when I saw the crown and sentiment "Queen Bee" I knew I had to make a card using those images.. So, I took the small honeycomb design and repeated that all over the Lemon Tart cardstock in Lemon Tart Ink...I love using the matching ink onto the cardstock..it isn't so overpowering of the paper and it adds some depth. I then stamped the crown and sentiment onto the paper. I stamped the large Queen Bee onto the same honeycomb background paper and used my circle and scalloped circle nesties to cut out. I had some black velvet ribbon leftover from a project I had done awhile ago and thought it to be fitting for a queen..I like what it adds to the card. My mom will definitely be getting this card!!!
 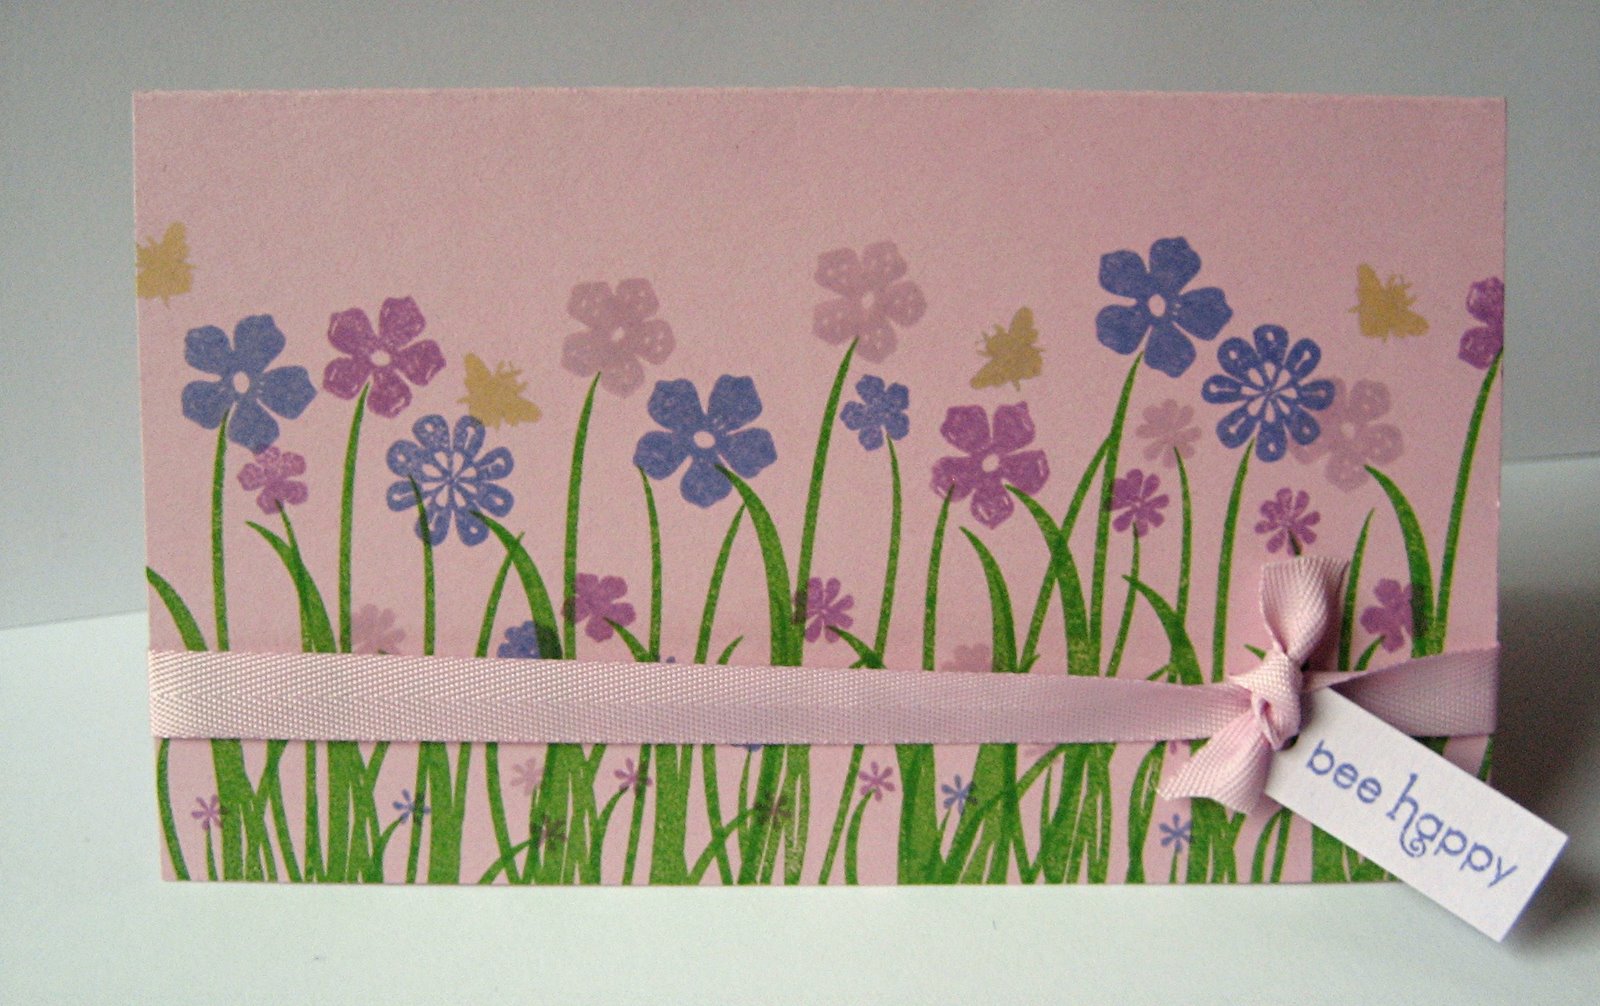 like the simple little flowers in this set. They are just the perfect size to create a little garden that I do not have to tend to..lol. I incorporated each of the sizes, as well as all the purple palette inks that I own. I then stamped a few of the tiny bee images throughout the flowers. I used the sentiment "bee happy". I just love that sentiment b/c I truly believe in being happy!!
Posted by
Bridget
at
10:22 PM
1 comments
![]()
![]()
Monday, June 9, 2008
Mojo Monday Week #41

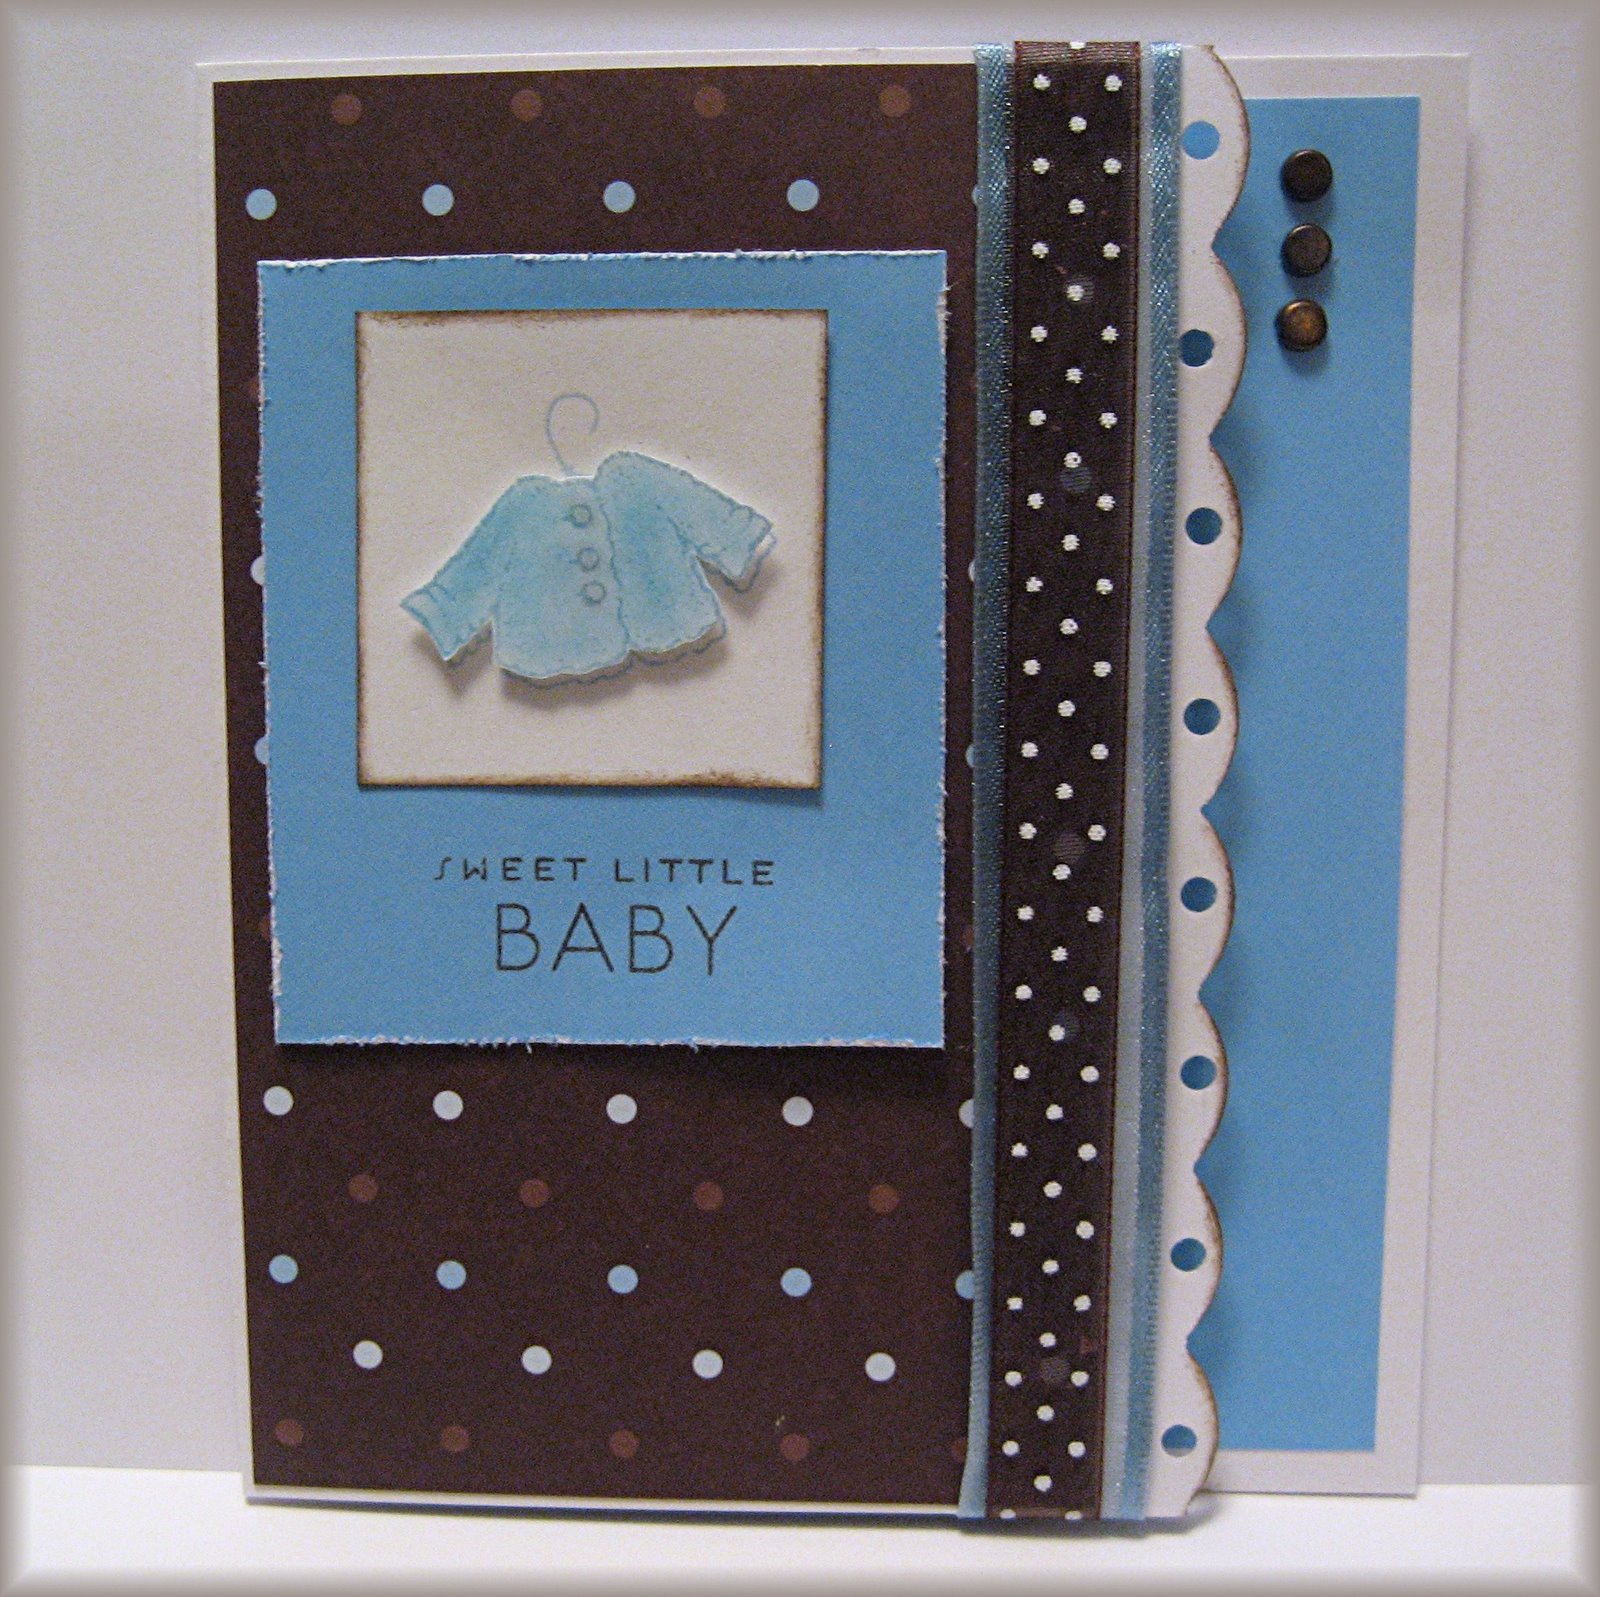 used the polka dot paper as my first layer, then the lighter blue paper for the larger square and PTI white card stock for my smaller square..I distressed the outer edges of the blue paper to give it a "fuzzy" look similar to the little baby sweater..I also distressed the white square with Burnt Umber ink to give it a bit of depth..I stamped the small baby sweater from Stampendous onto the white square..I then re-stamped the image on a separate piece of white paper and colored it in using soft pastels. I really like how the pastels
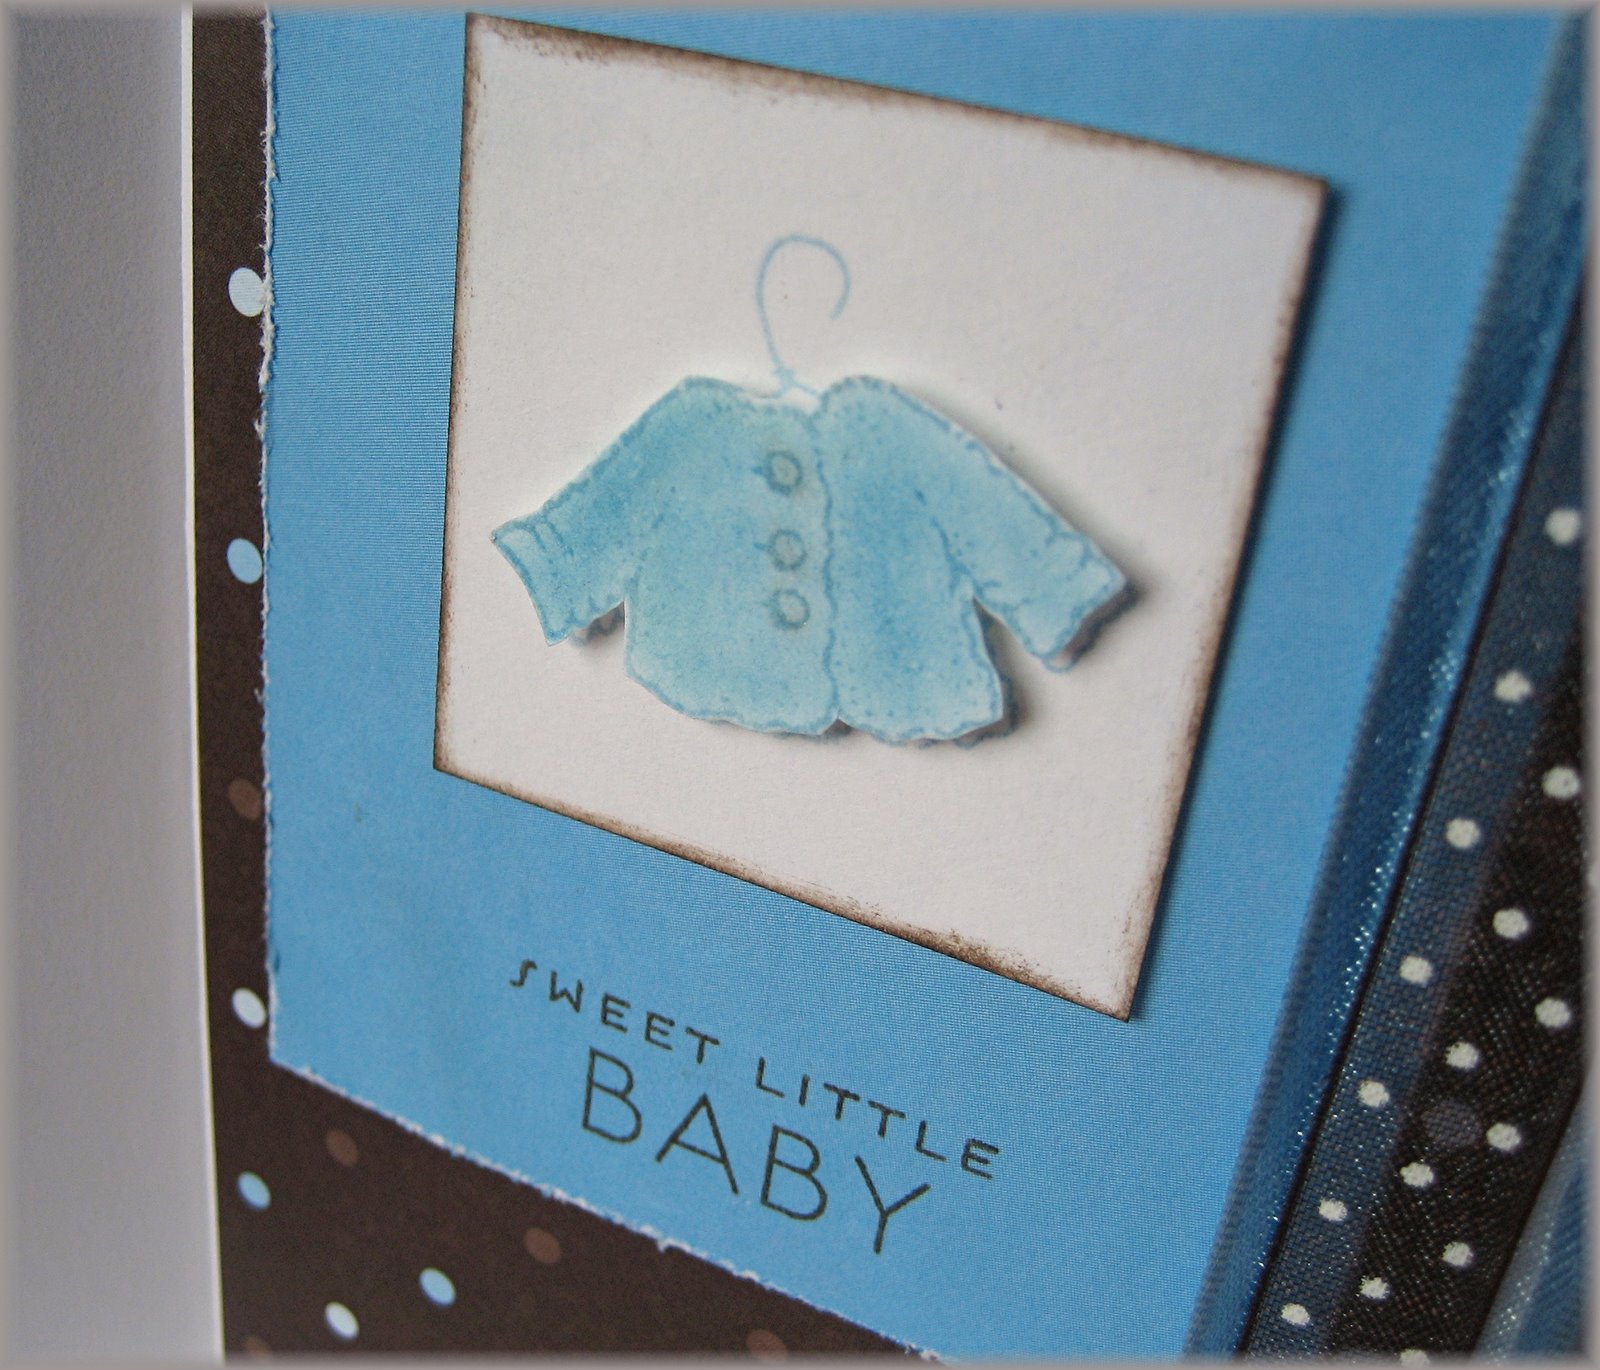 made the sweater look fuzzy and cozy! I then cut it out, leaving behind the hanger..I placed it over the original stamped image with a dimensional..I like how the pastels made the sweater look cozy and fuzzy and I also like how the sweater is over the hanger..it gives it more of a 3 dimensional look. The sentiment is from PTI's Bitty Baby Blessings set. I used my corner rounder punch to create the scalloped edge and went back through and punched small holes in each scallop. I like how you can see the blue paper through the holes...I finished the card with a light blue/brown polka dot layered ribbon and 3 brown brads. Very simple but I hope that the new mommy I am giving it to enjoys it!! Thanks for looking!!
Posted by
Bridget
at
3:36 PM
3
comments
![]()
![]()
Wednesday, May 28, 2008
May Papertrey Blog Hop!!!
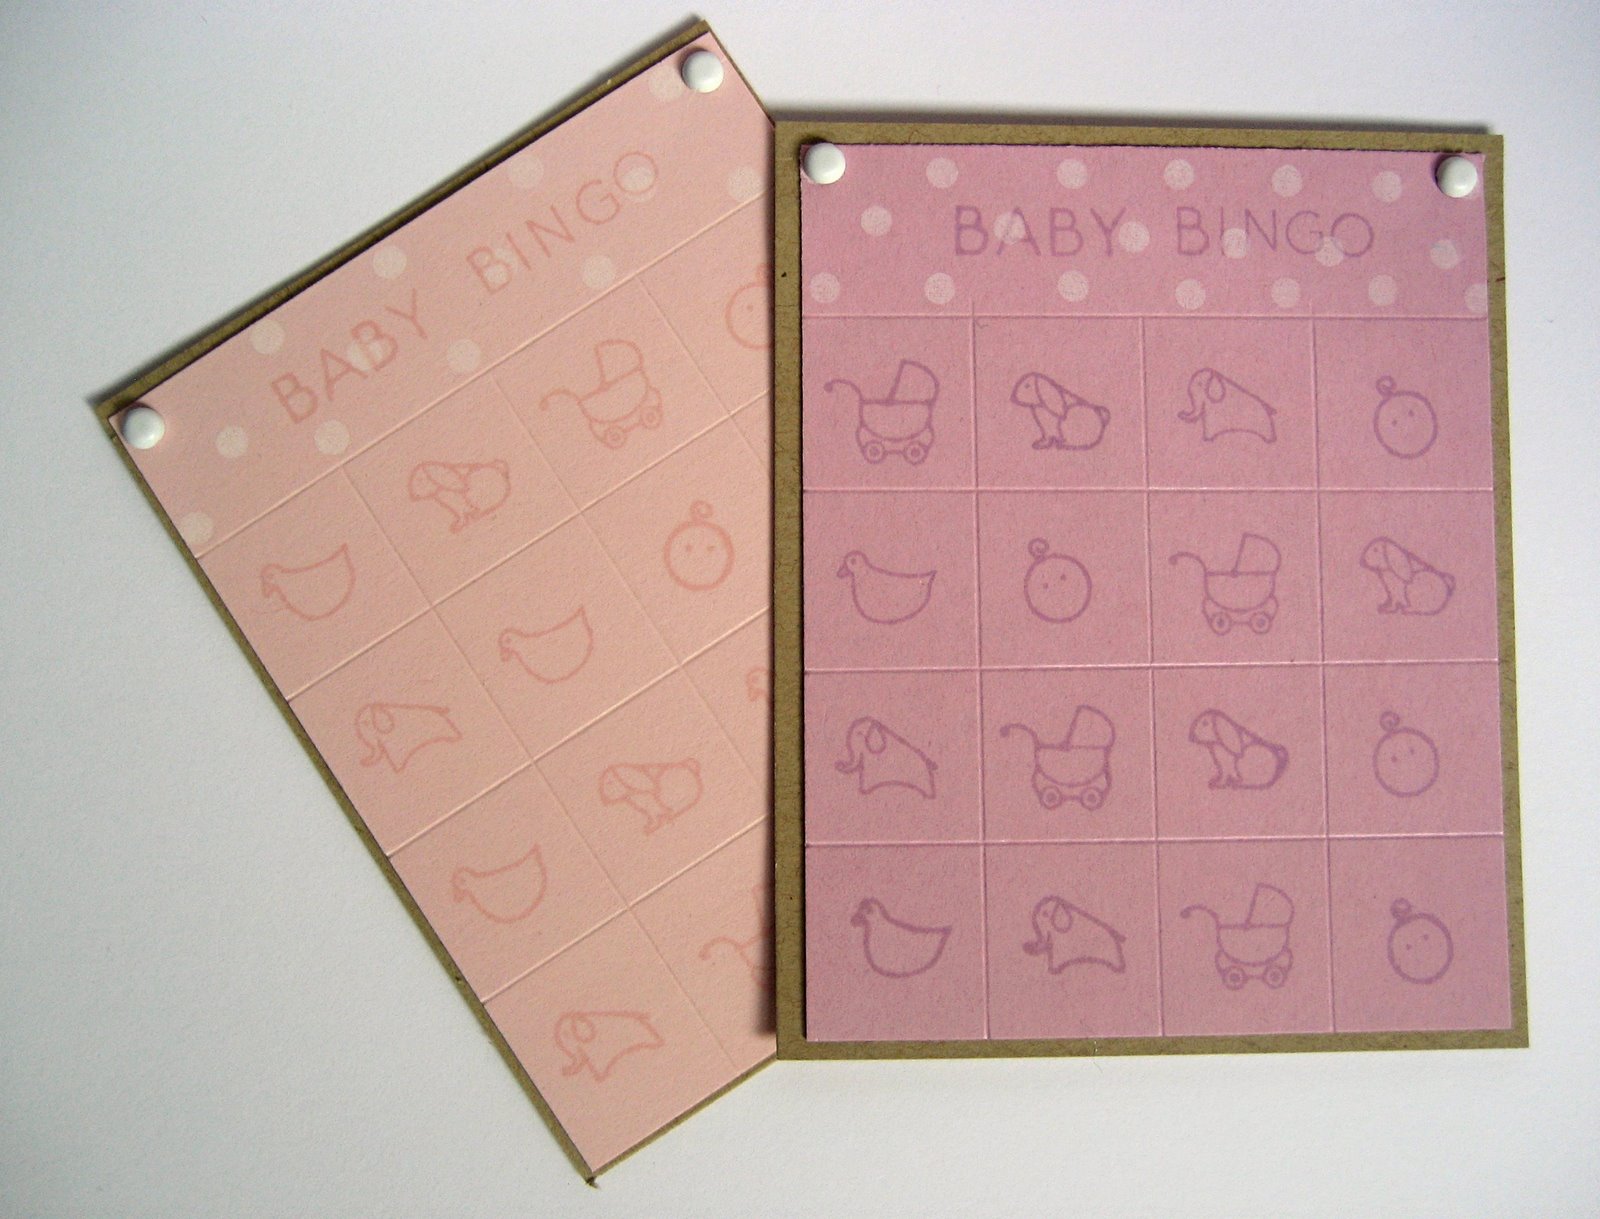 I started by cutting 12 3 3/4 X 3 inch squares from the Lavendar Moon and Sweet Blush Papertrey Card Stock. I then placed a square lengthwise and scored every 3/4 of an inch so I had a total of 4 scored lines. I then turned the square vertical and I started scoring my lines starting from the bottom
 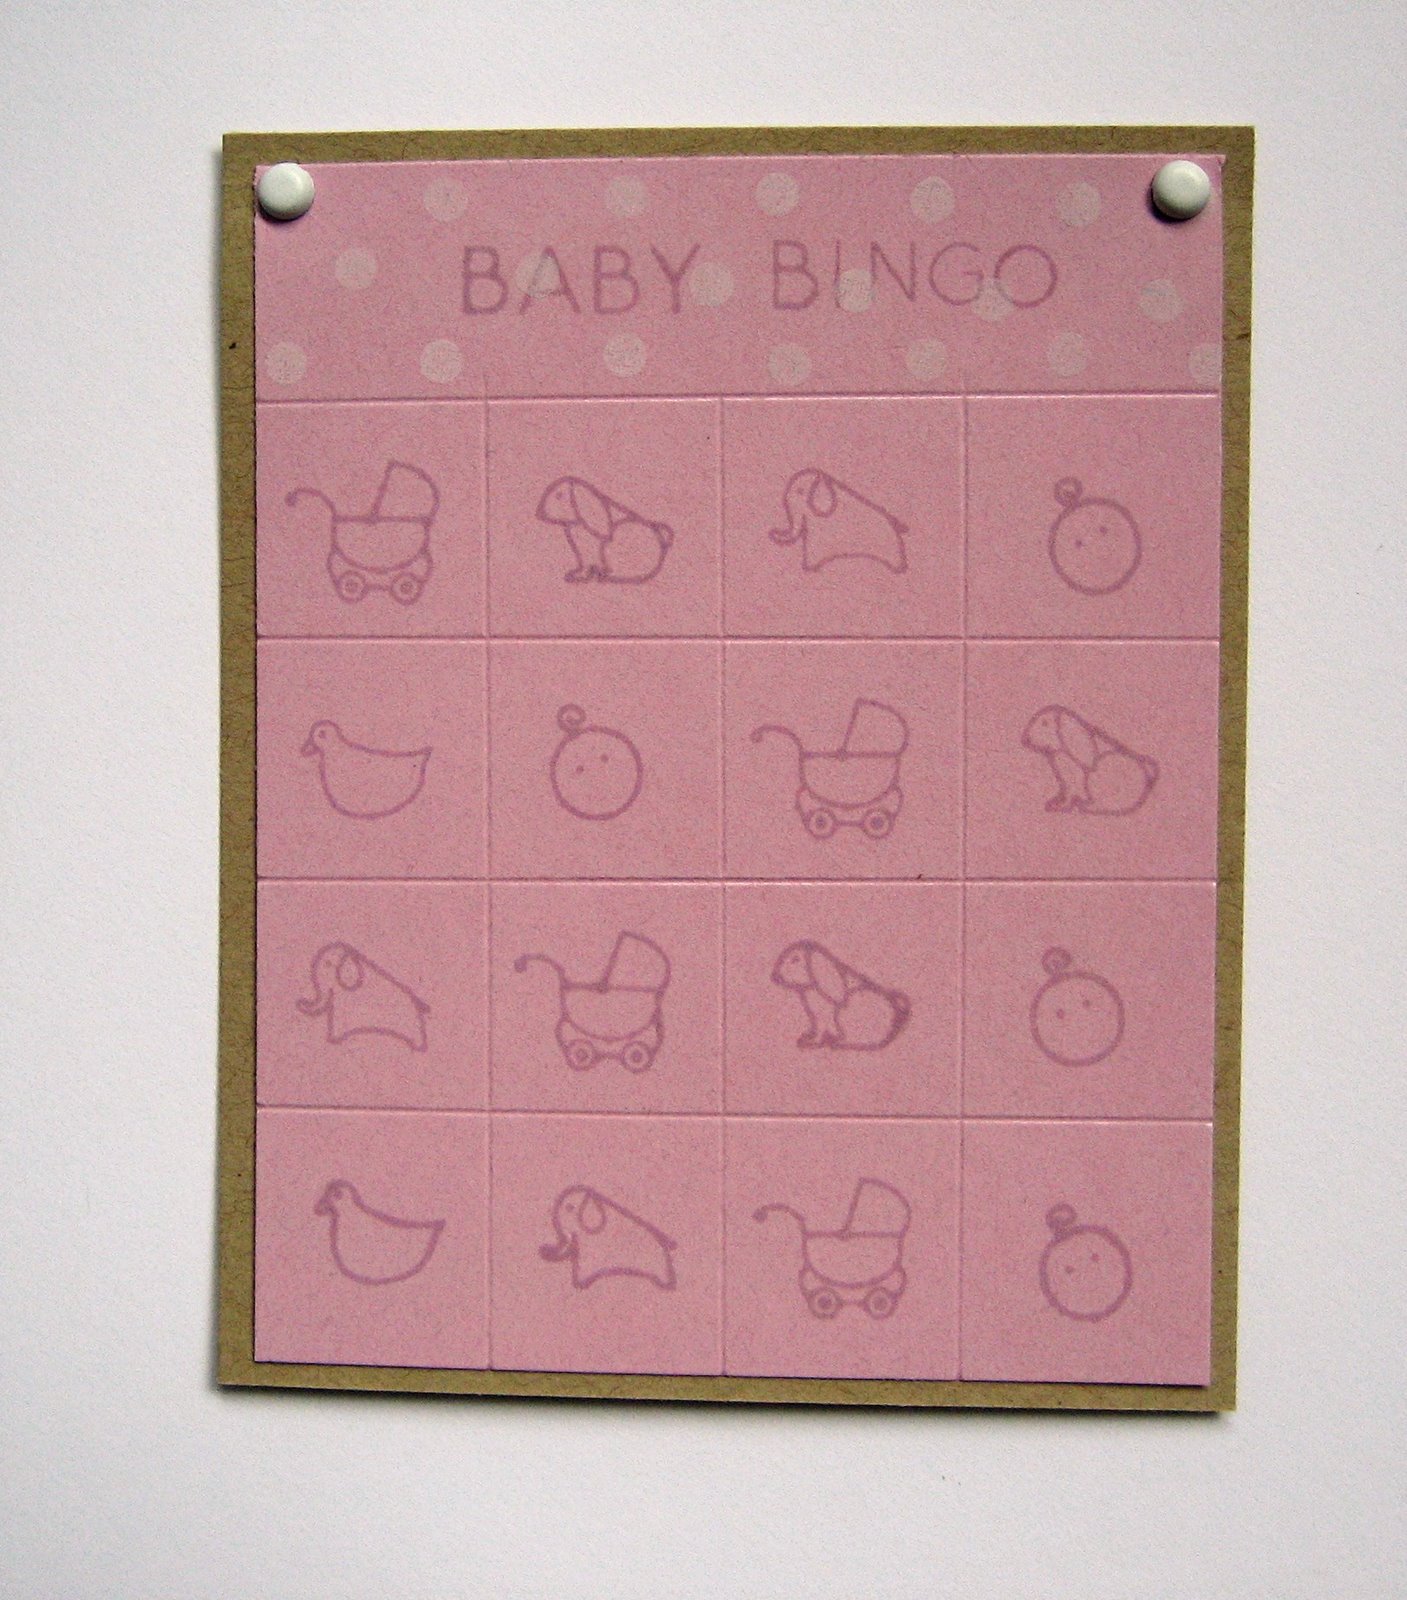 of the first score line I made when it was lengthwise.(You do this so you have a place to stamp your sentiment "Baby Bingo" without having scored lines there.) You will score every 3/4 of an inch moving vertically with a total of 3 scored lines. You should now have a 4x4 grid with a 3/4th of an inch opening at the top. I then took my Polka Dot set and stamped the middle sized polka dot just on the top. I stamped out "Baby Bingo" using the sentiments from Bitty Baby Blessings. I just used the sentiments "Good Things come in Multiples" and "Baby makes three". I used scotch tape to cover up the letters I did not want to use and was able to spell out "Baby Bingo". Hope that makes sense!! I then just took the tiny
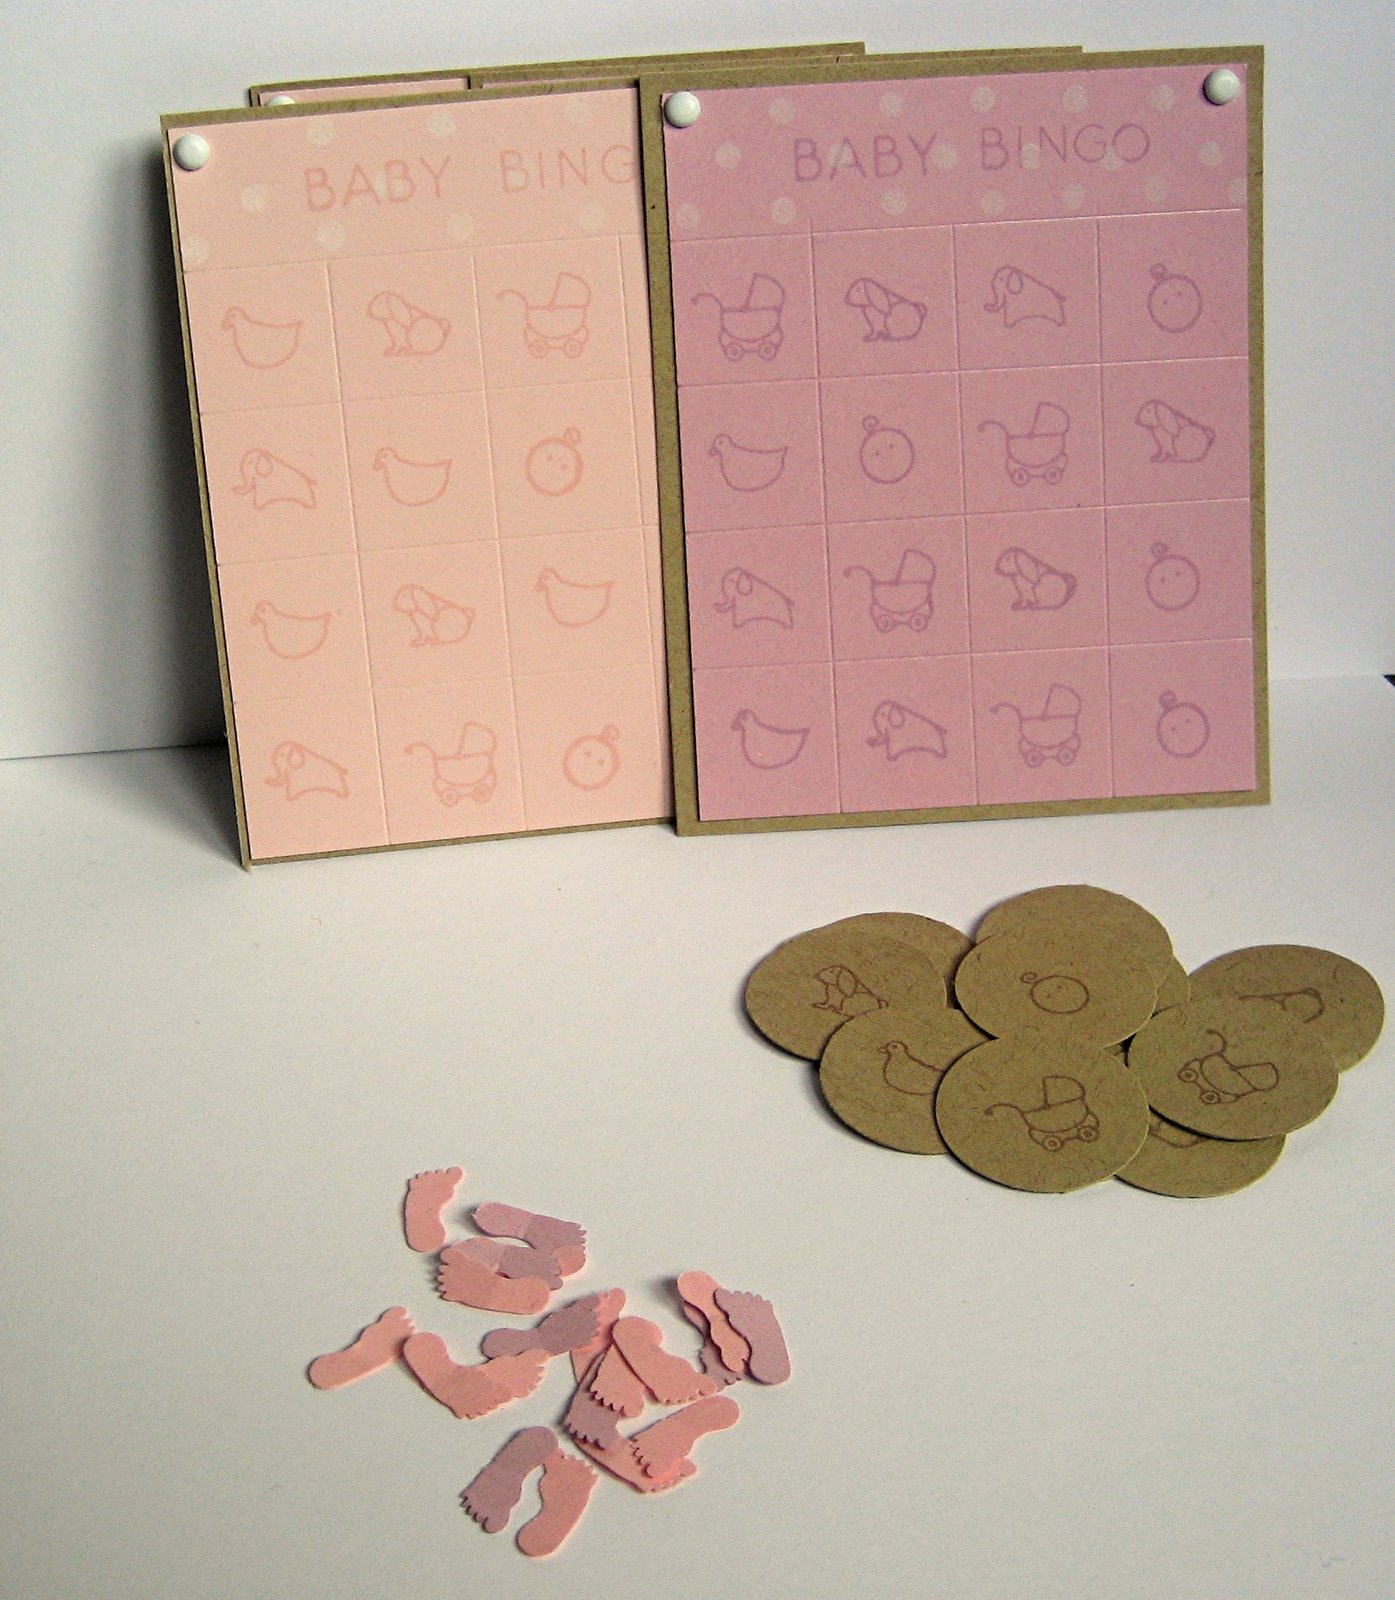 stamps from Bitty Baby Blessings and randomly placed them in the squares I had created....Make sure each card you create is different from the others...I finished the Bingo Card by placing it on to a piece of Papertrey Kraft paper and using two small white brads on the top. I repeated these steps with all 12 squares so I ended up with 12 Bingo Cards. I have a paper punch of baby feet that I decided to use as my game pieces, so I punched out several of the feet in both colors I had used. I then punched out several small circles from the Kraft paper and stamped the tiny images I had used on the Bingo Cards onto them. Now you are ready to play Baby Bingo!! Before you play, place a few bowls full of the punched baby feet(or any game piece you decide to use) around the room. Place
 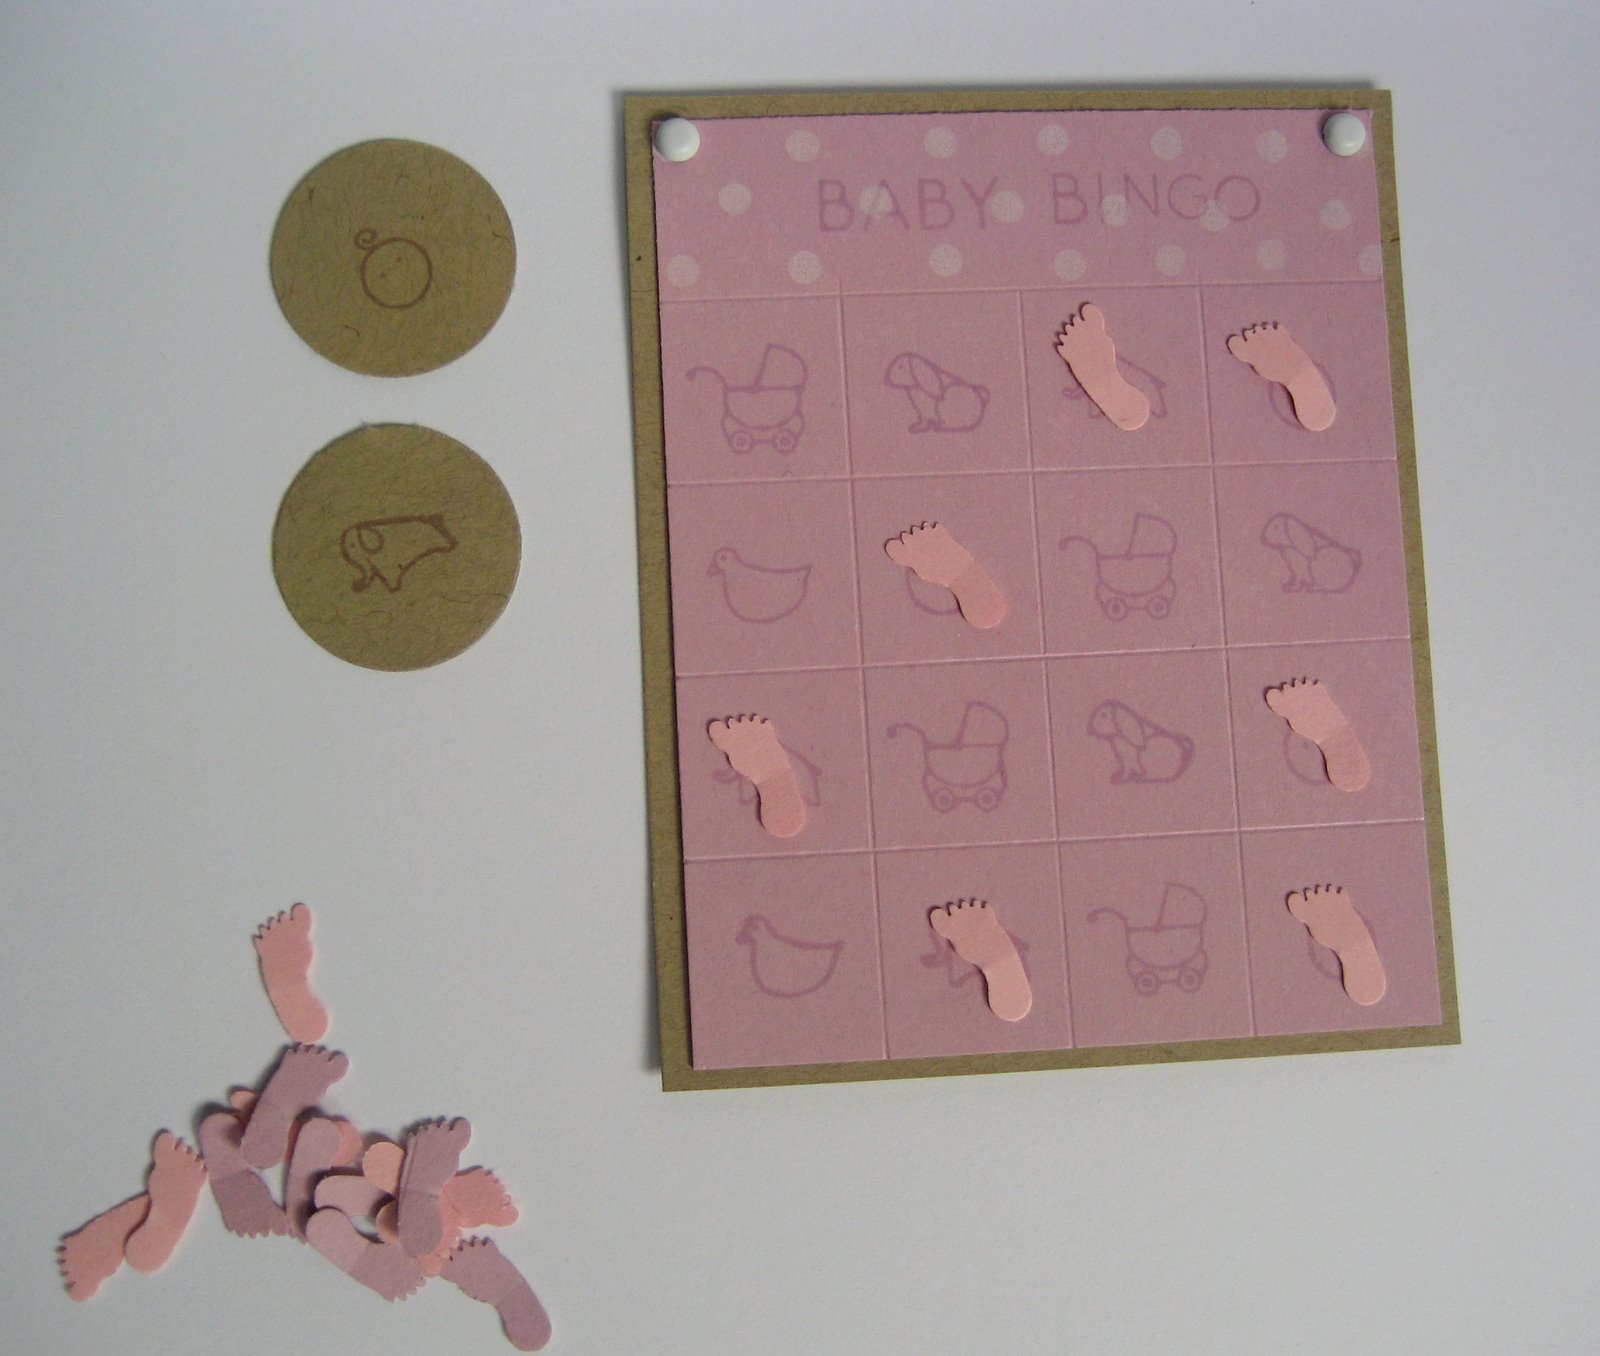 the circle pieces into a bowl or bag and have the new mommy pick out the pieces and call out the image. You can play by having whoever fills up the whole card first wins, diagonals, corners, etc. It really is up to you...There you have it.. A quick and easy project that utilizes score lines in a fun way!! I think this would be such a fun little game to introduce at a baby shower..the images are just too cute for words!! Thanks for looking!!! Bridget Rose
Posted by
Bridget
at
3:06 PM
33
comments
![]()
![]()
Friday, May 16, 2008
More GSS Entries...
I'm back to share more of my cards that I submitted for the GSS over at Papertrey Ink...
I just love the Garden of Life set..the flowers are so whimsical and sweet. 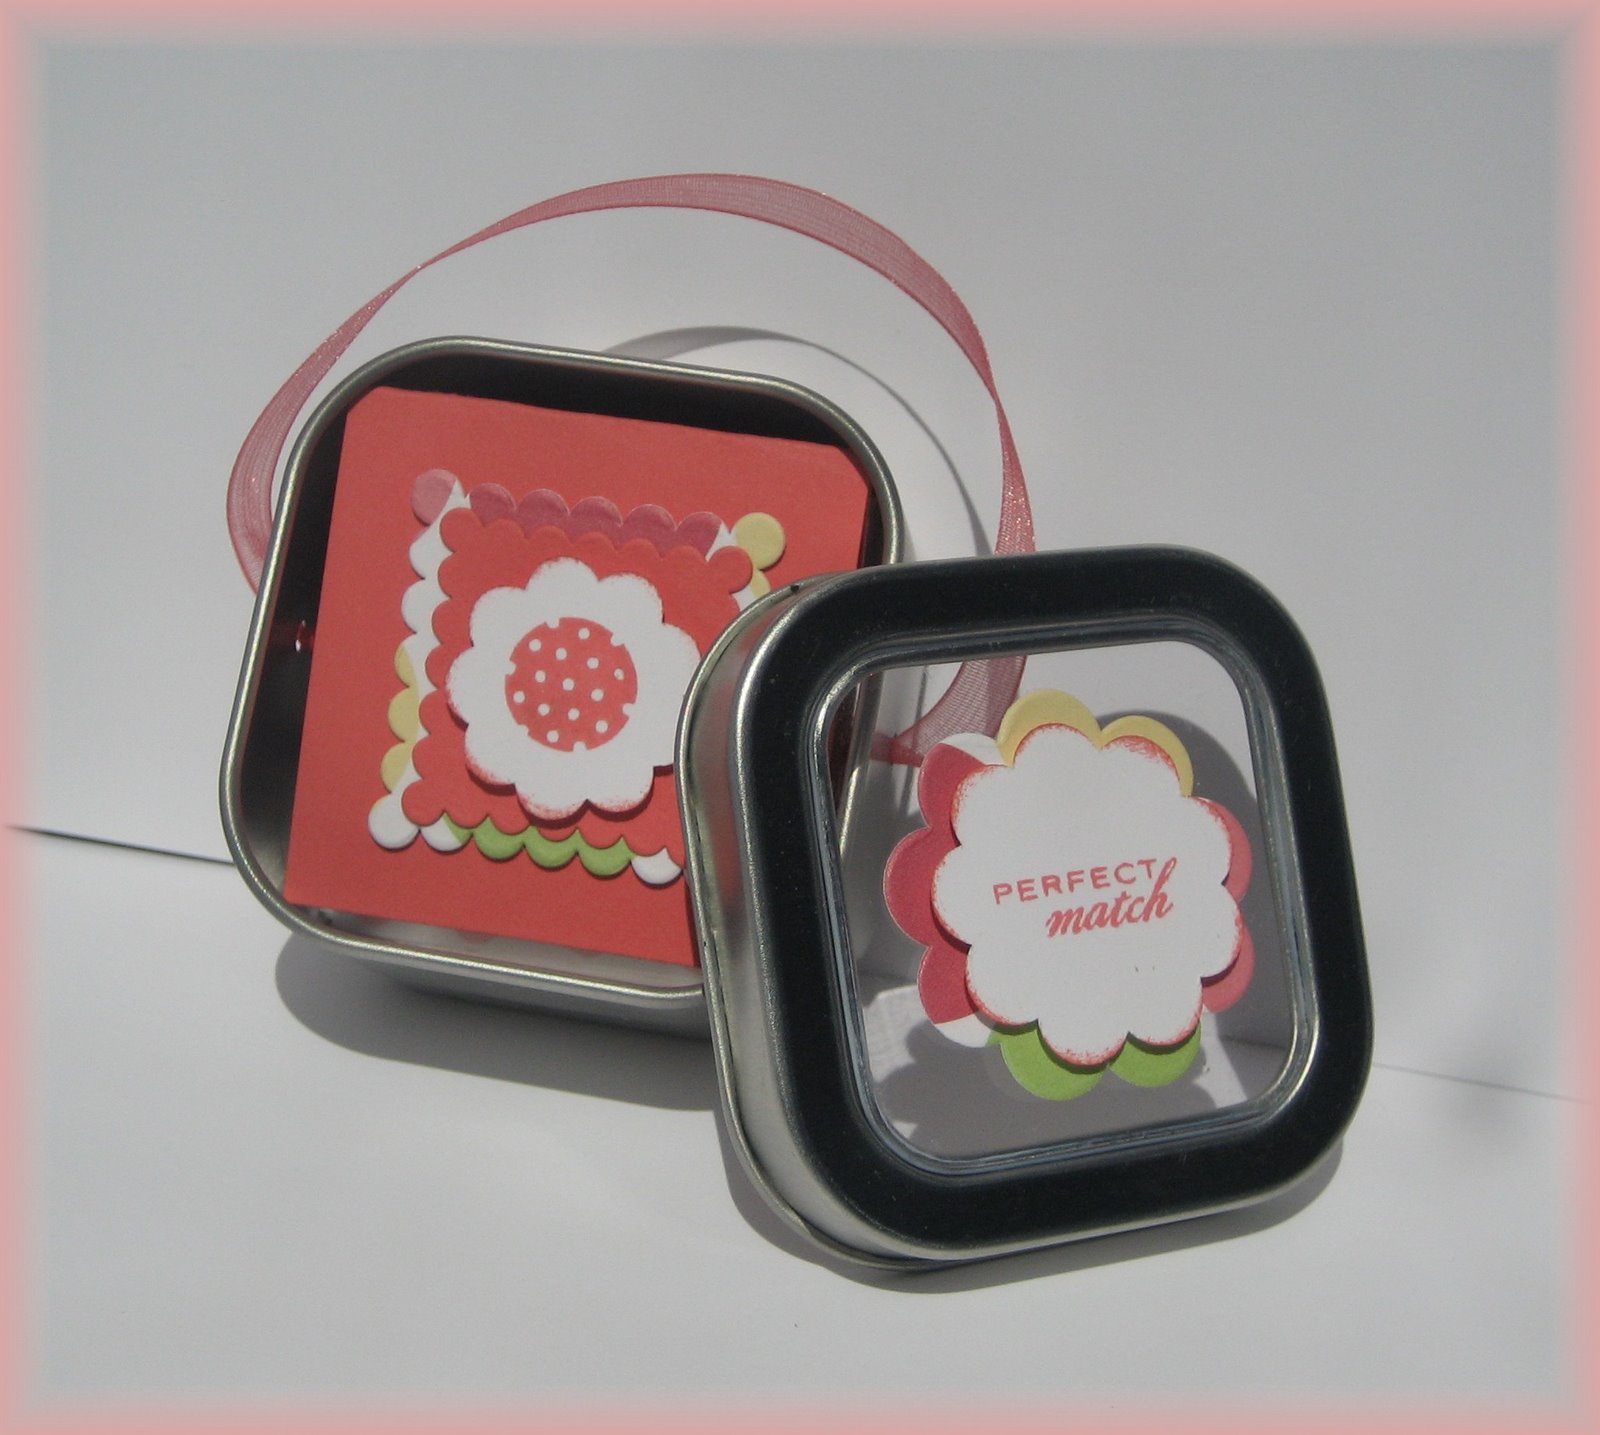 There are so many different ways to play with these flowers by layering and changing up colors! Well, I have a little niece who just loves flowers so I decided to create a small and fun little gift for her using this set. She loves to play the matching game so I thought why not make one for her. I took a piece of PTI's white cardstock(the best)..it works great for this little project because it is so thick. I then took a piece of patterned paper and used double sided tape to place on
 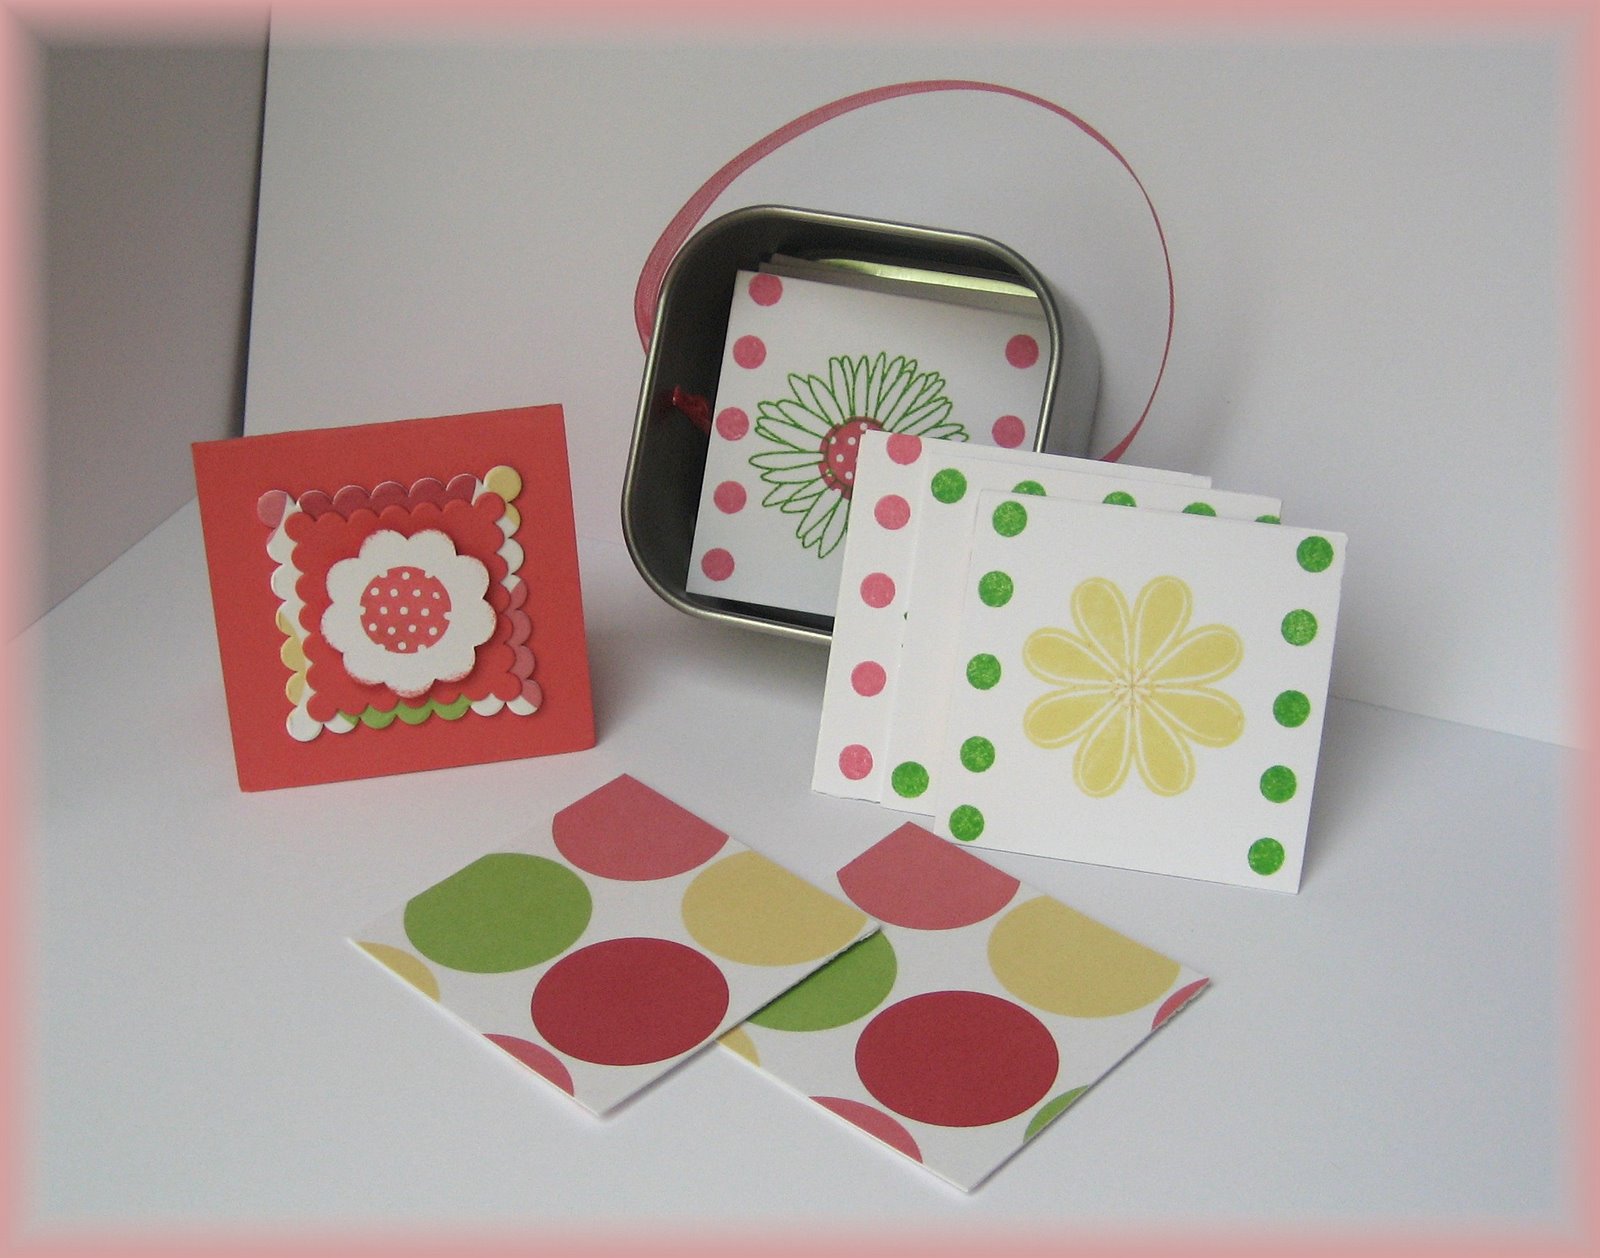 one side of the white paper. I then just cut 12 2x2 squares. Next, I took a flower image from Garden of Life and stamped that on 2 of the squares so I had a pair. I continued this with the rest of the squares so I had a total of 6 pairs. I took one of the small square tins from PTI, used my crop-a-dile and punched two small holes on each side for a ribbon handle. If you do not own a crop-a-dile, put it onto your wish list...they are so worth the 30.00..and just keep
 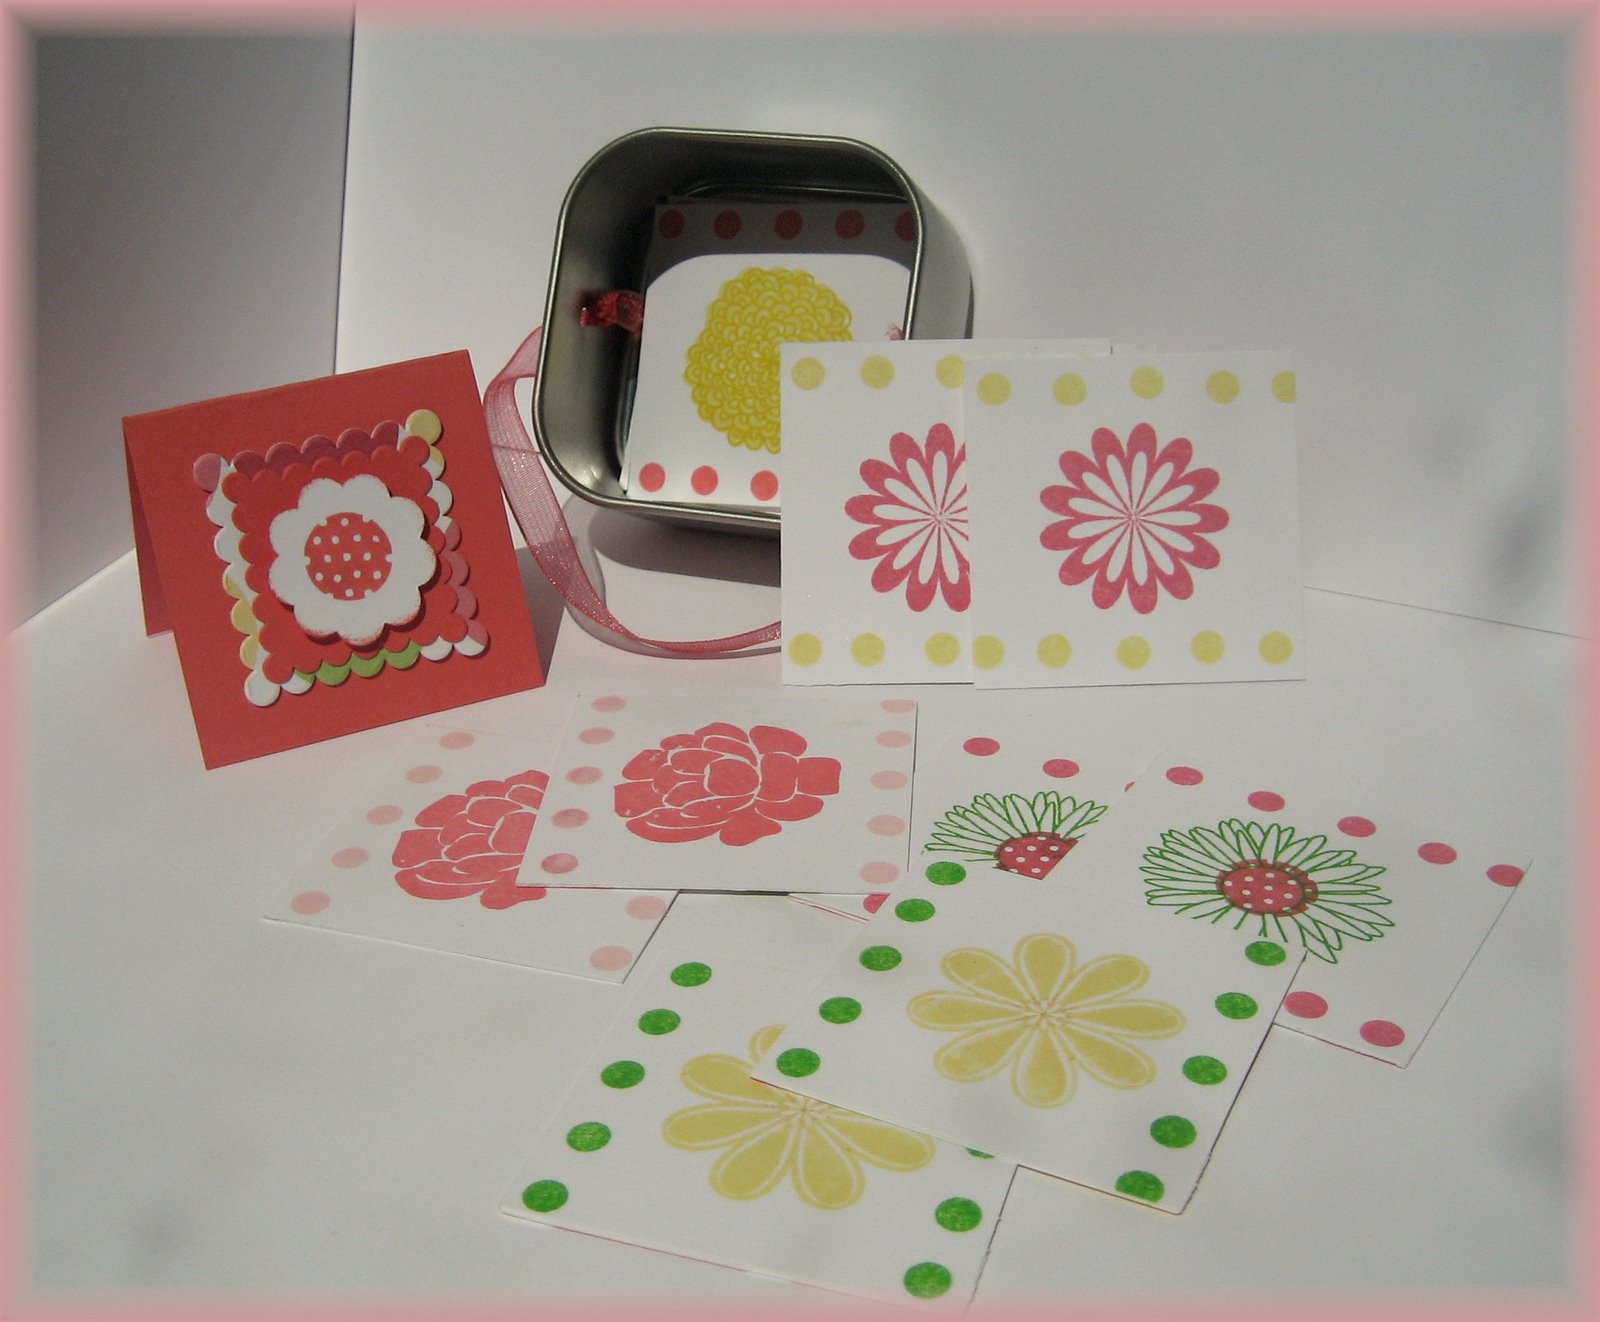 an eye out for a Michael's coupon..you can get it for super cheap then. For the outside of the tin I used the sentiment "perfect match" from Favor it Weddings..I thought that coordinated well with this little gift. I also created a small 2x2 birthday card to coordinate with this gift. I placed it on top of the squares and then put them into the tin.. they fit perfectly inside it. I think she will really get a kick out of this
 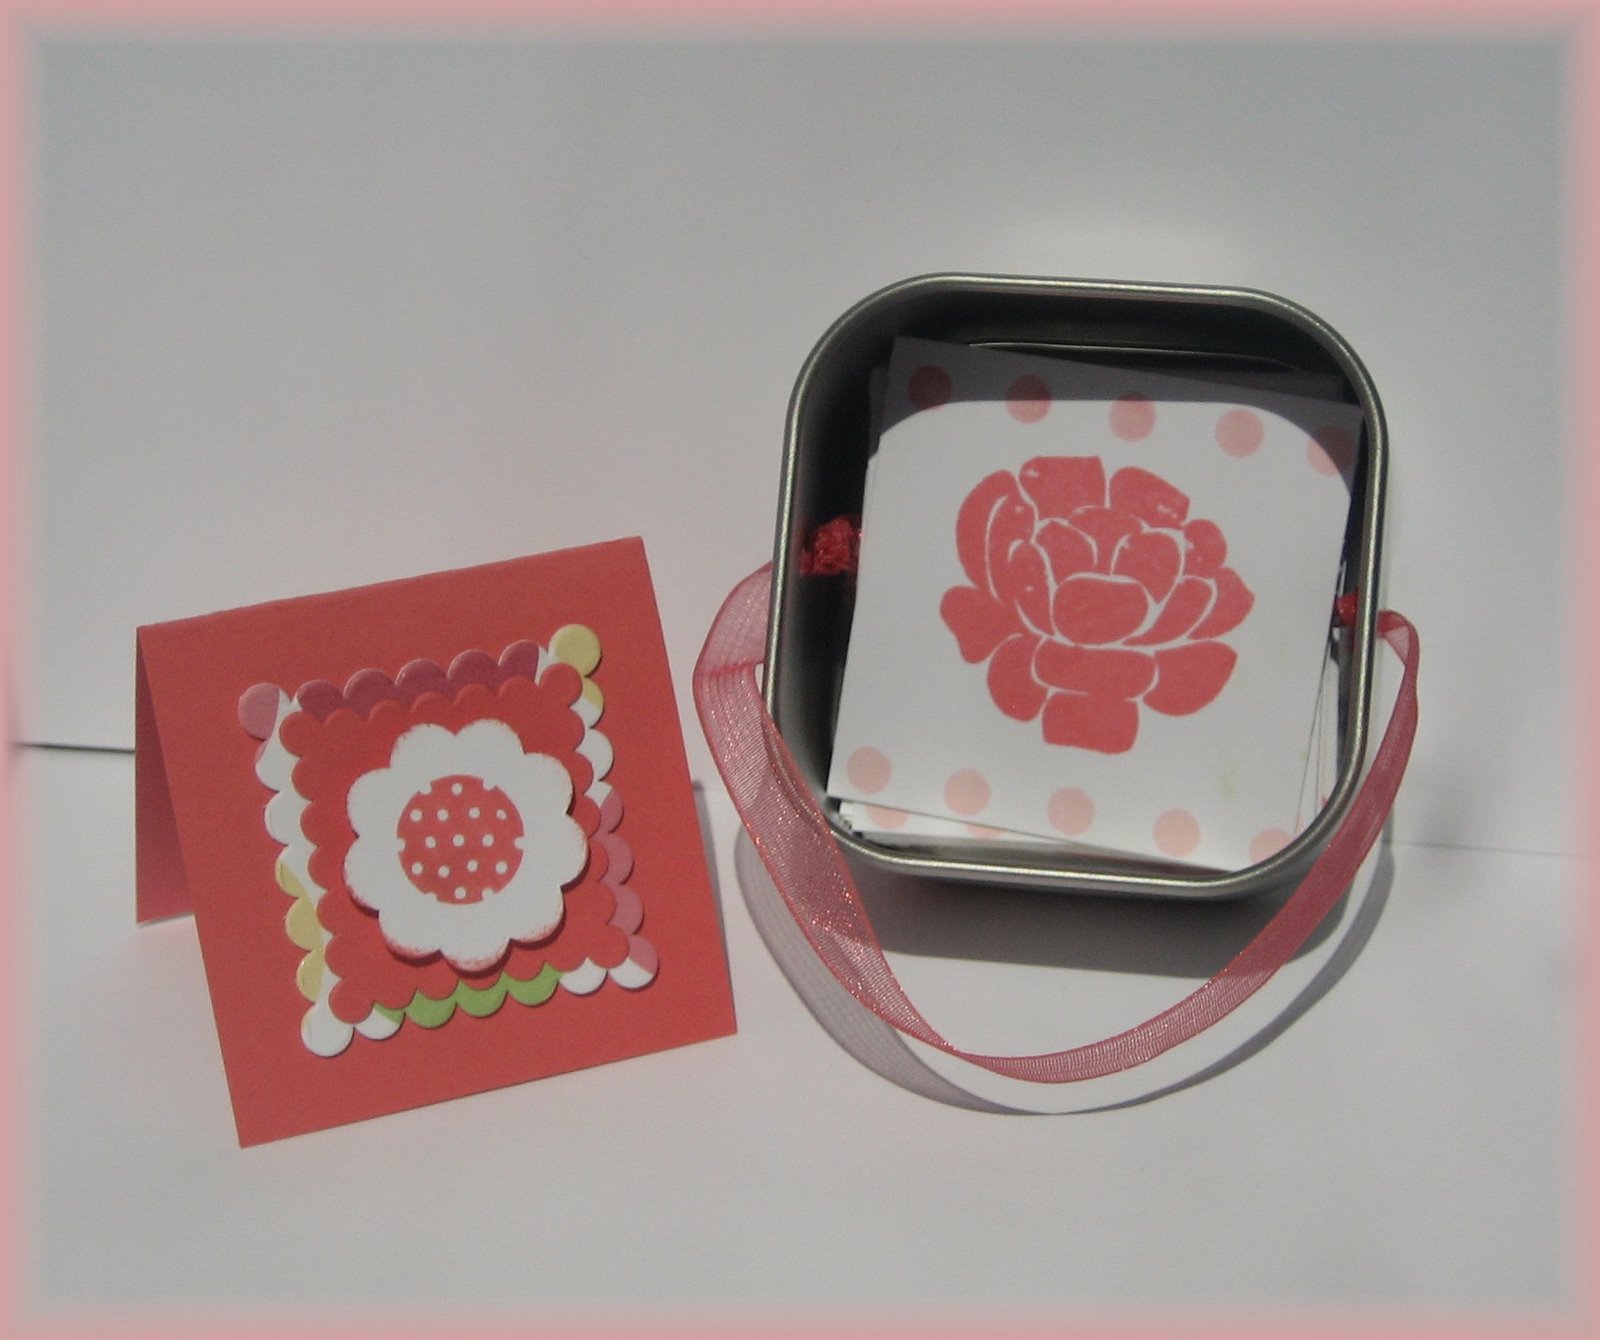 and I love how she can carry it with her..to church, restaurants or anyplace to keep her occupied and I know her parents will love that too!!!
My next entry once again uses Garden of Life...As you know I love roses
 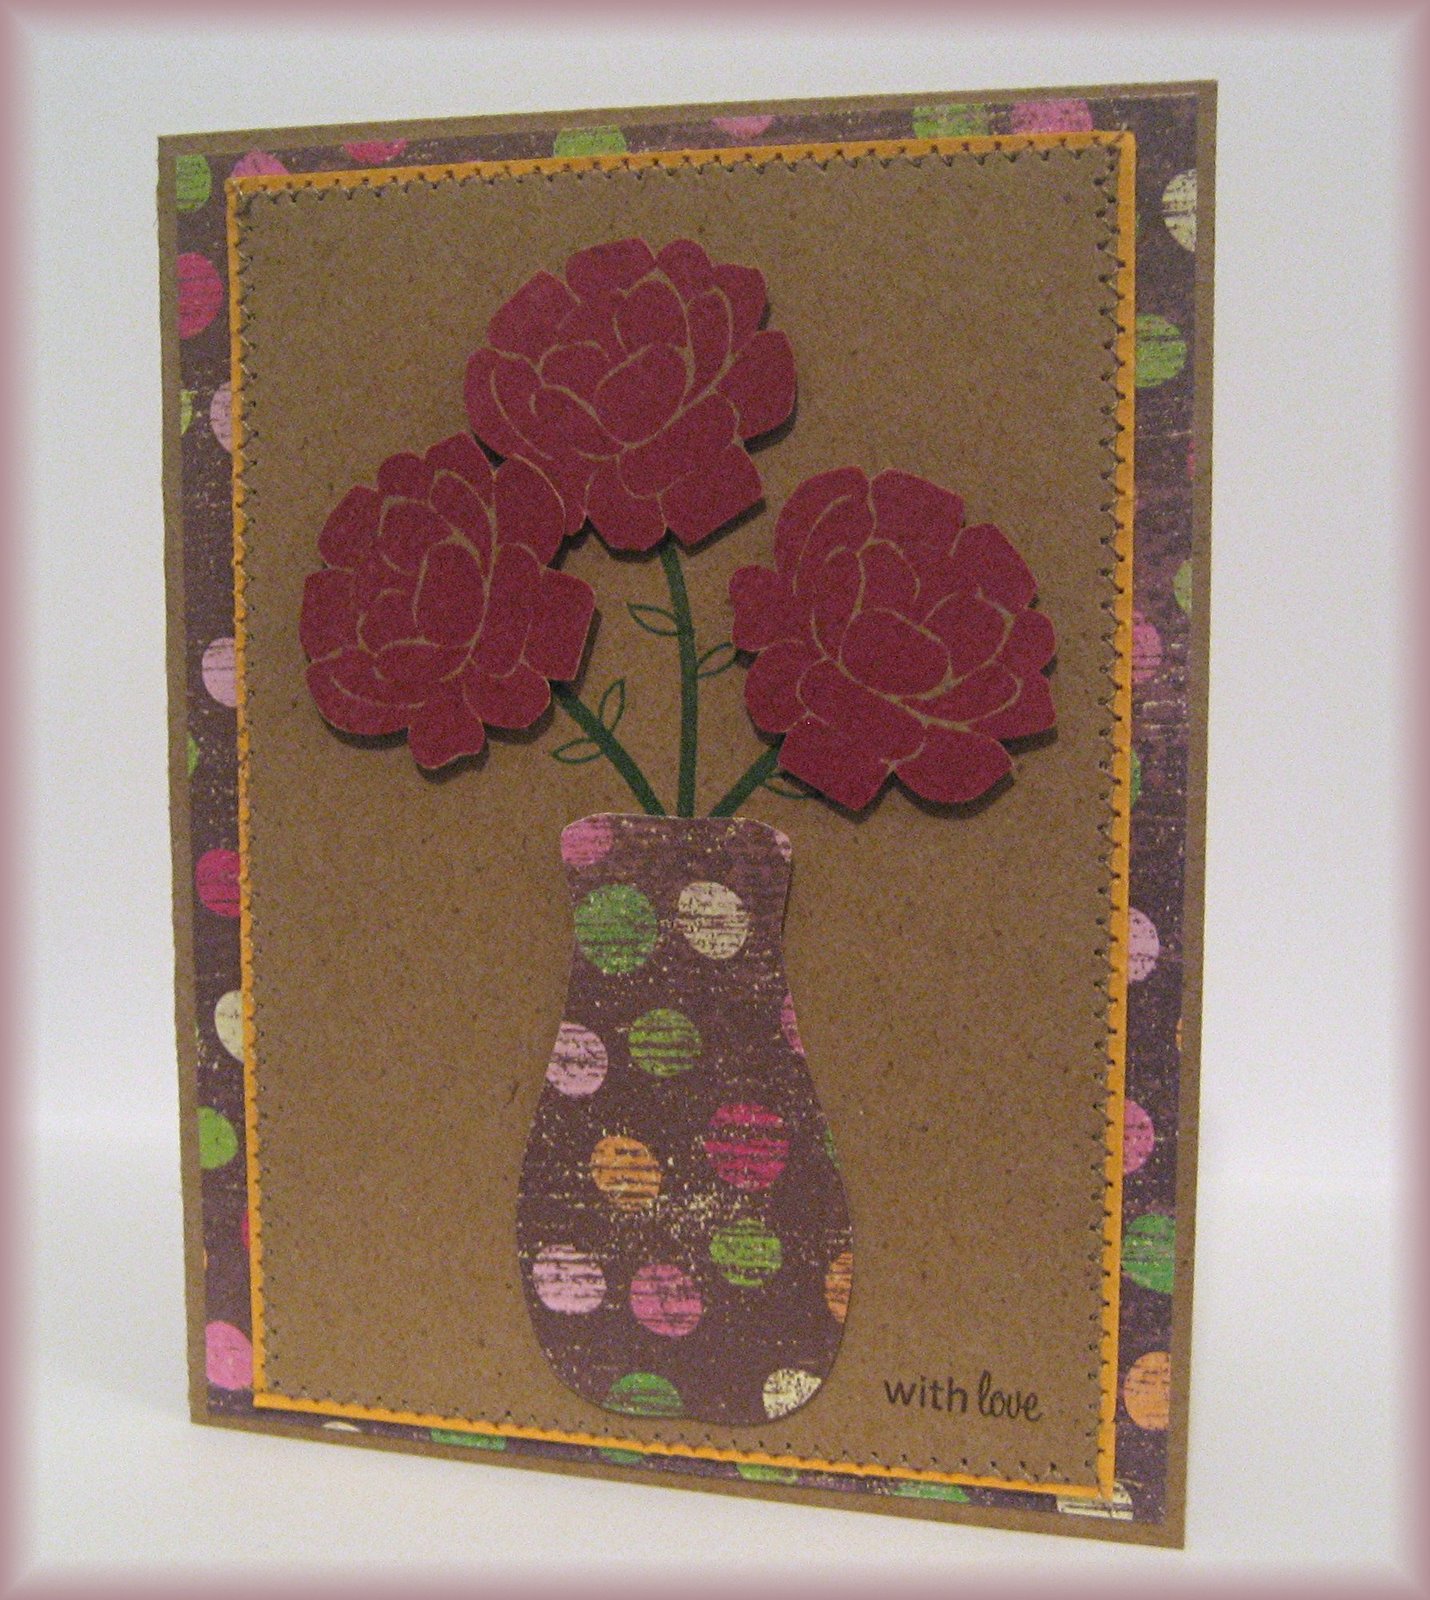 and everything about them..The name Rose runs in my family and my daughter and I both have it as a middle name..So, it means a great deal to me.. Well, I just started playing around with this stamp and ended up creating this card..it is a pretty simple card but that is what I love about it.. I stamped the roses onto Kraft paper and cut them out and placed with dimensionals..I sewed a piece of Sunrise Cardstock to Kraft paper using a simple stitch and placed this over my patterned paper. I used the stems from Garden of Life and the leaves from Spiral Bouquet. The vase is just a cut out from my leftover patterned paper. I used the sentiment "All things grow with love" but only used the "with love"..I just love that saying!! Because I didn't have much space for words it fit perfect for this card.
This third card was created using the Pond Life set. I took a piece of PTI white cardstock and stamped the water, the fish, bubbles, splashes and tall
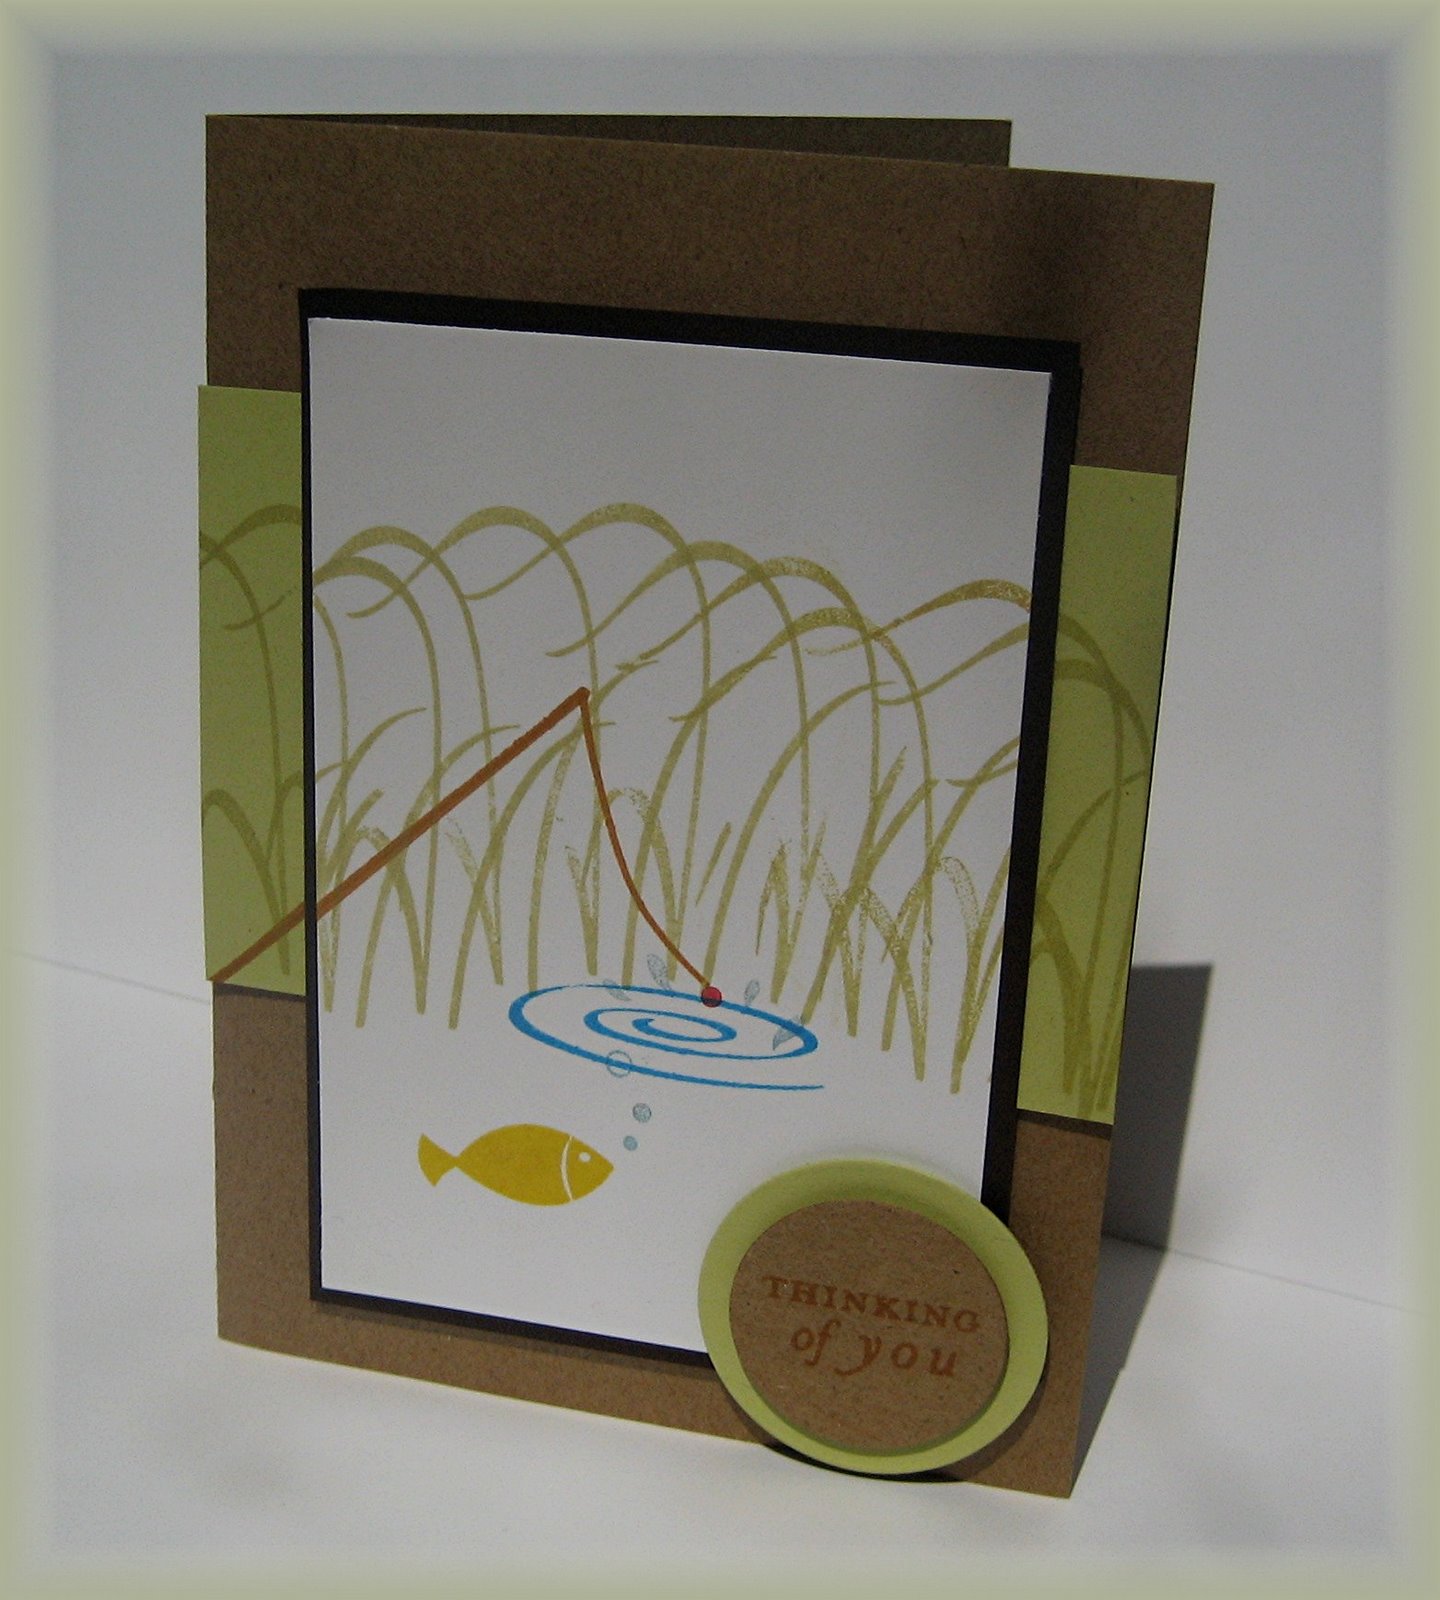 leaves. I then took the longer cattail pieces and created my fishing pole by manipulating it how I wanted it to go. Isn't that the best thing ever about clear stamps?? They are just so versatile!! I placed this onto brown cardstock. I then took a piece of Spring Moss Cardstock from PTI and continued stamping the tall leaves as well as my fishing pole.. I like how this turned out..I feel like the white cardstock is a little scene that is popping out of a bigger picture...and the sentiment "thinking of you" is fitting for a fisherman's day out on the water!!
Thanks for looking!!!
Bridget
Posted by
Bridget
at
9:33 AM
0
comments
![]()
![]()


